Cattle Management System User Guide
1. Account Application
New organizations that wish to use the backend management system must first submit an application to us (the manufacturer).
After receiving the application, we will create an organization account and assign a Super Administrator to manage the organization and its permissions.
Contact Information: nonagon technology nonagontech@126.com . Zhang Yue yale@seismi.co .
2. Login
Open the following URL in your browser: https://iot.seismi.co/
Enter your account and password to access the backend management platform.

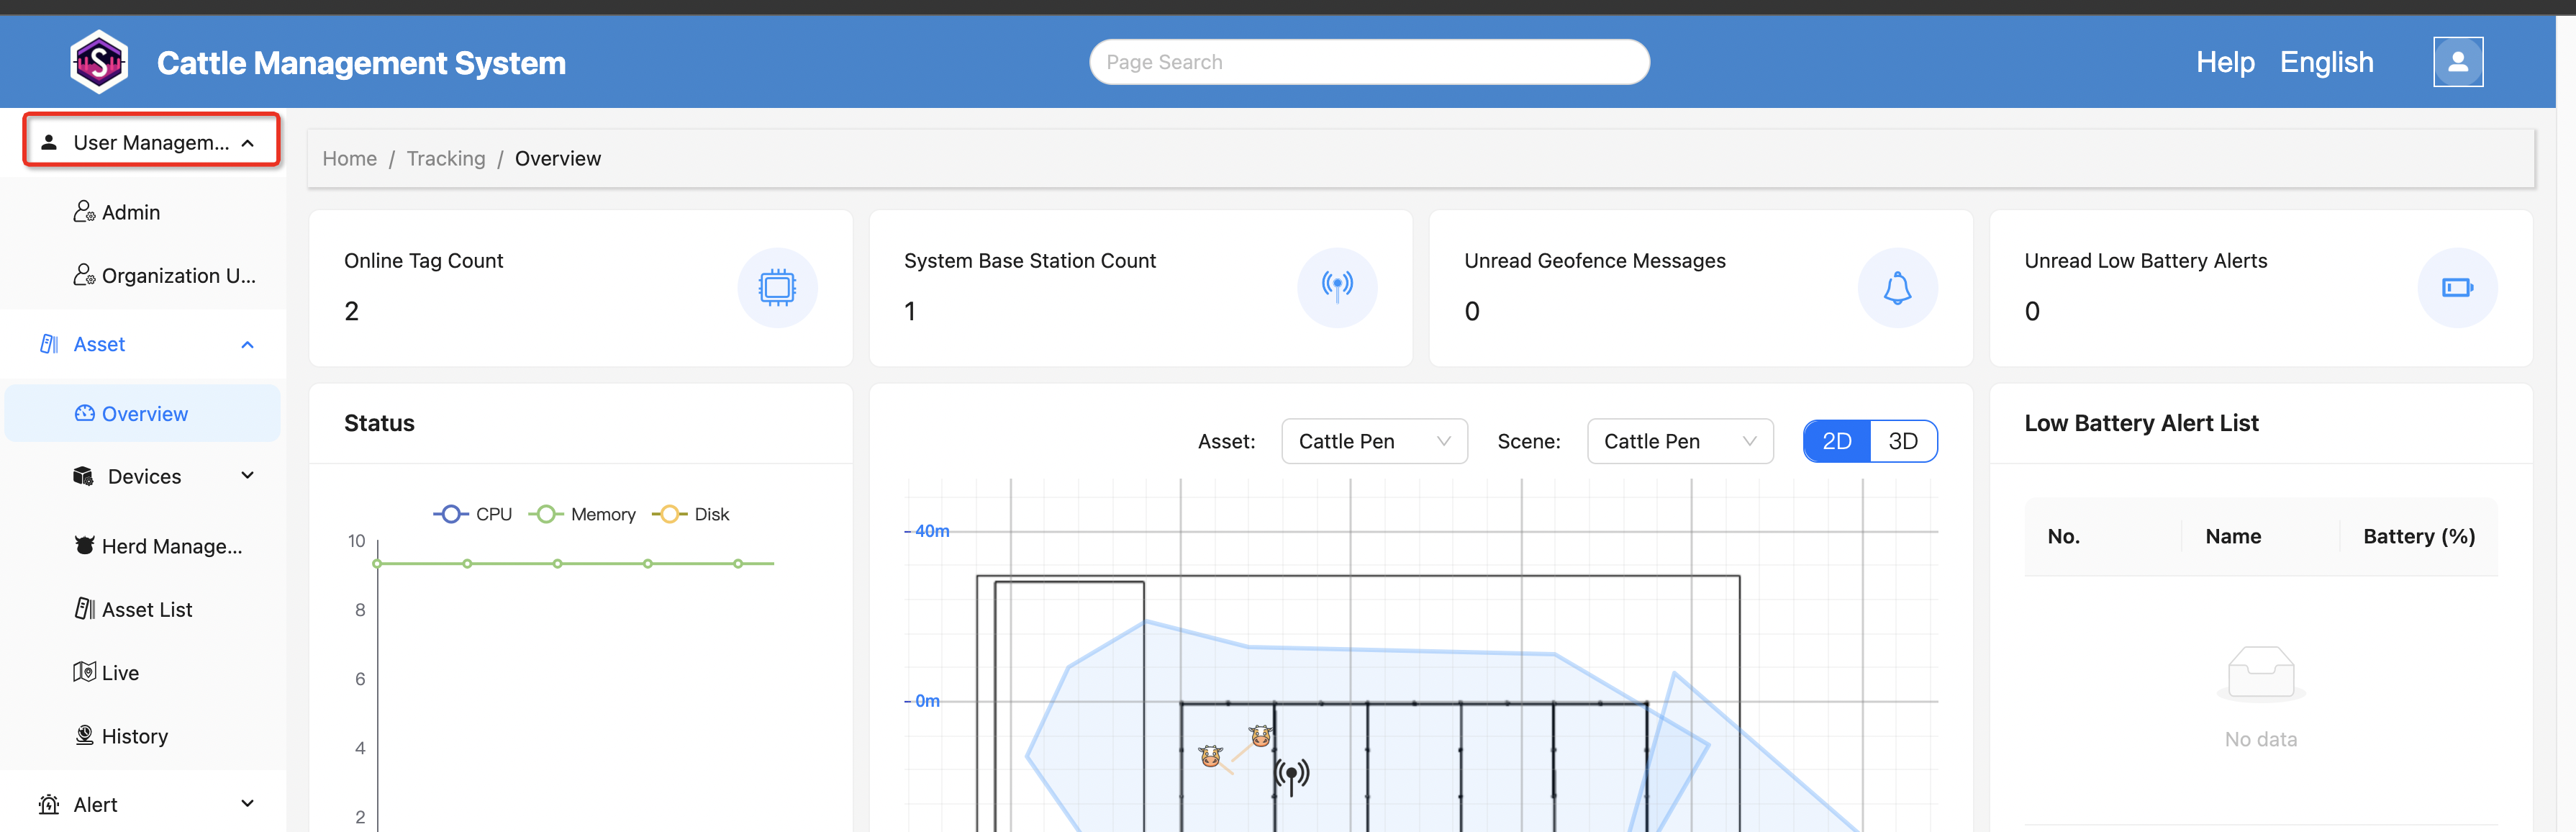
3.User Management
After logging into the platform, users with user management permissions will see the “User Management” option in the left-side menu.
In this section, you can view all administrators and organization users within the current organization.
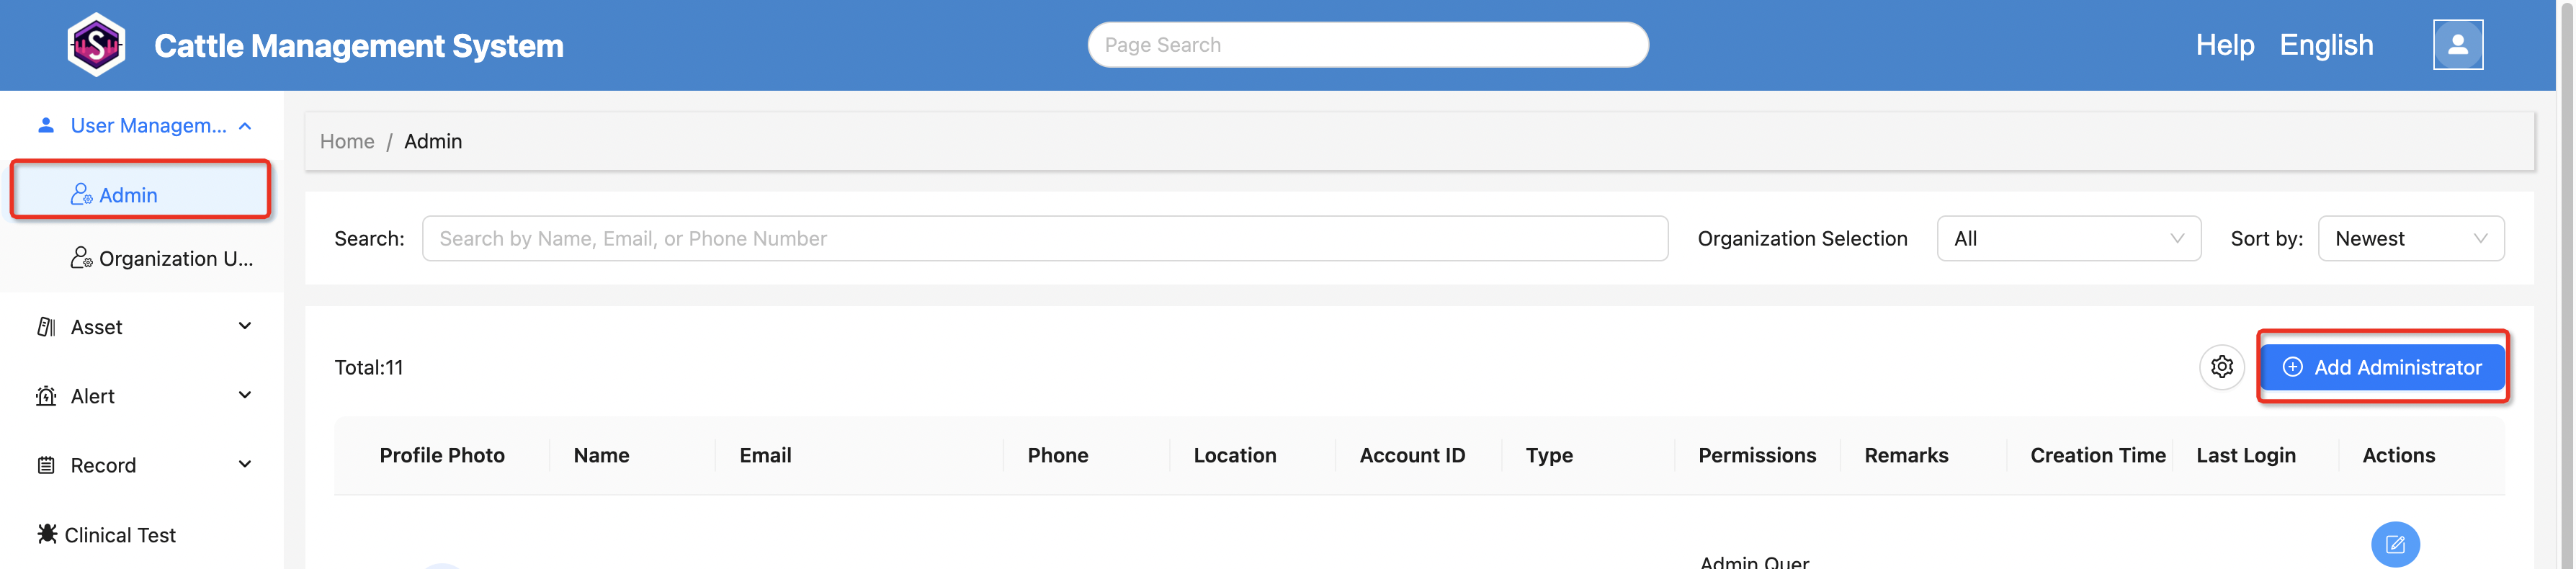
3.1 Add Administrator
Go to User Management → Admin to view the administrator list.
Click the “Add Administrator” button in the top-right corner to open the creation dialog.
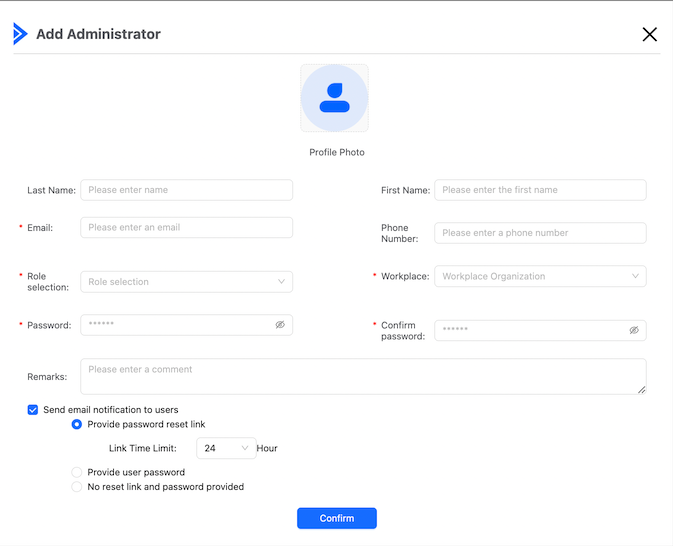
Fill in the following information:
- Profile Photo
- Name
- Phone Number
- User Role
- Workplace
- Password
When creating the account, you can choose one of the following notification methods:
- Send email notification to the user
- Provide a password reset link
- Provide the account password directly
- Do not send links or passwords
After completing the information, click “Save” to add the administrator successfully.
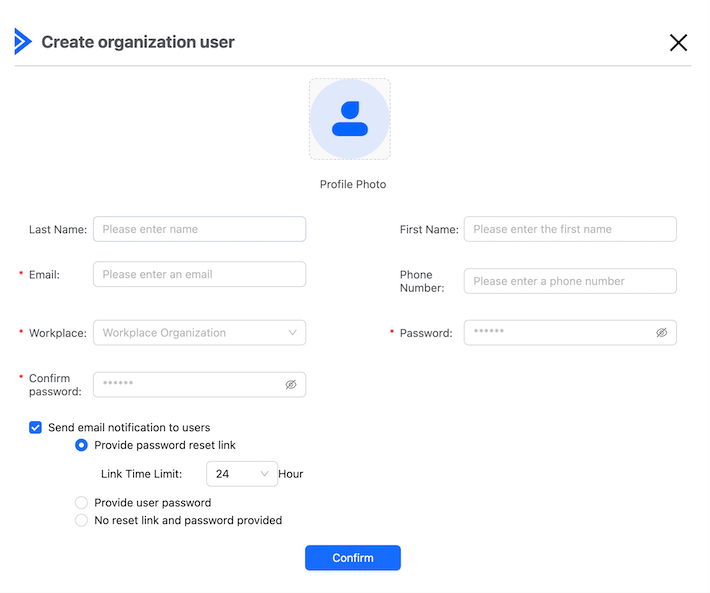
3.2 Add Organization User
Go to User Management → Organization Users.
Click the “Add organization User” button in the top-right corner to create a new organization user.
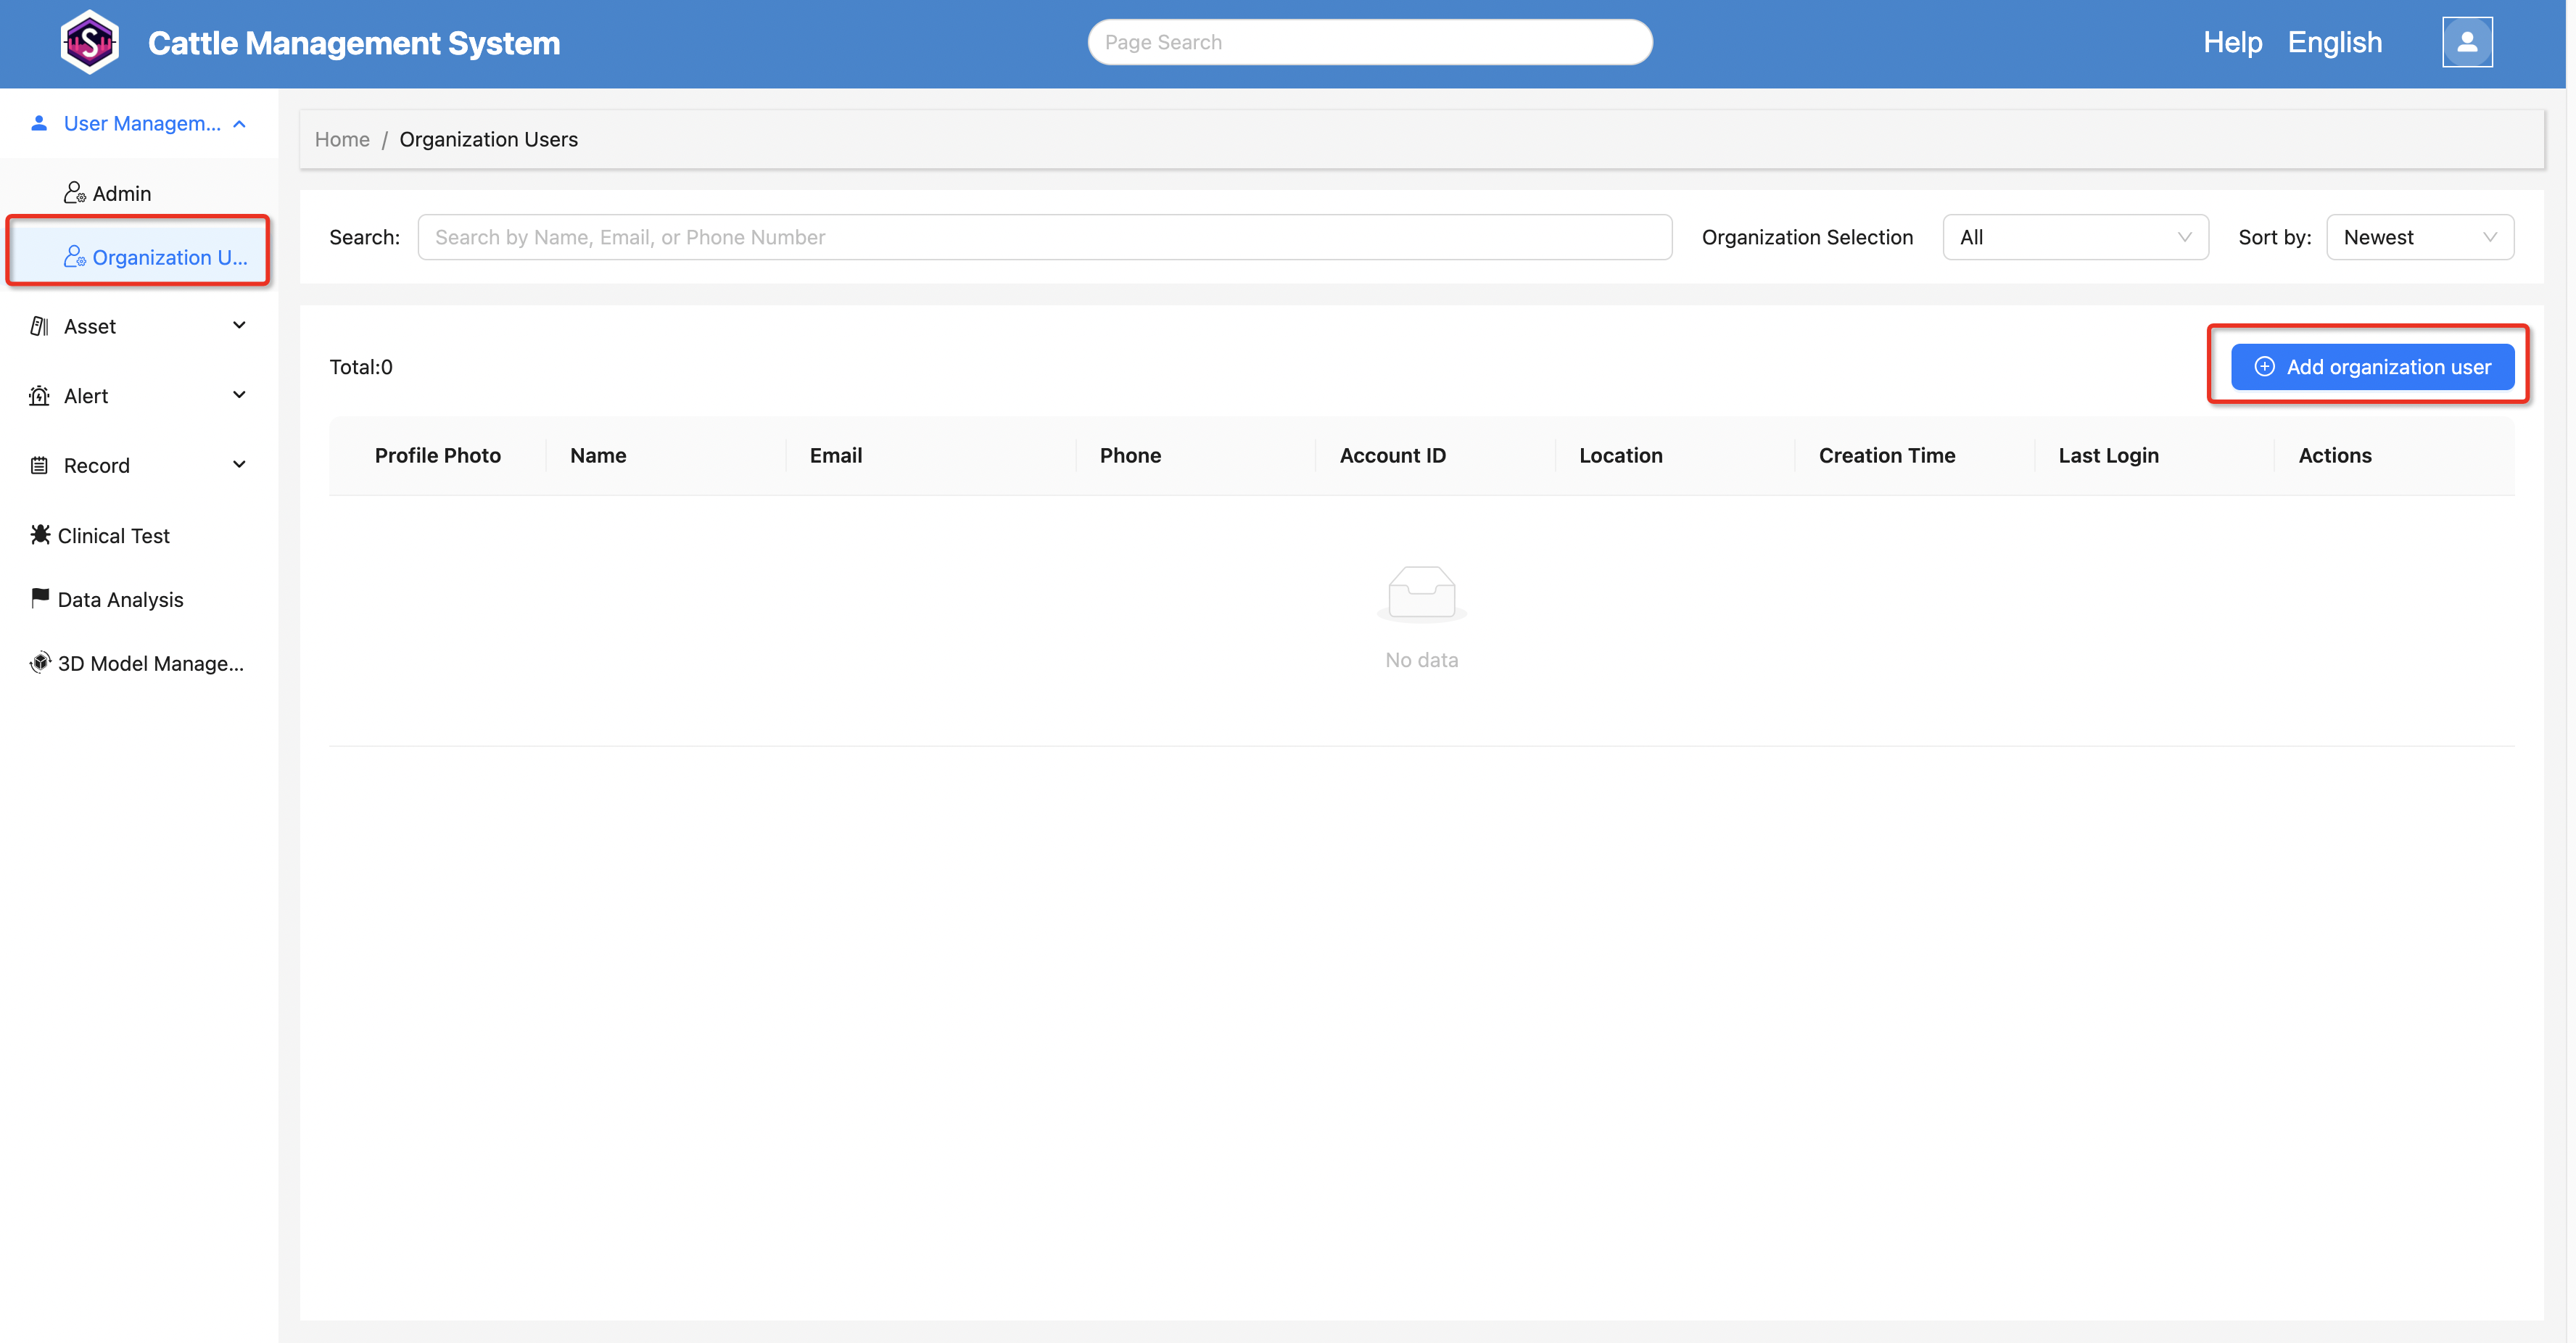
The creation process is similar to adding an administrator, except that:
- No user role selection is required
- No additional permission configuration is needed
Organization users can access the following features by default:
- Device Management
- Cattle Management
- Alarm Management
- Vaccination Record Management
- Treatment Record Management
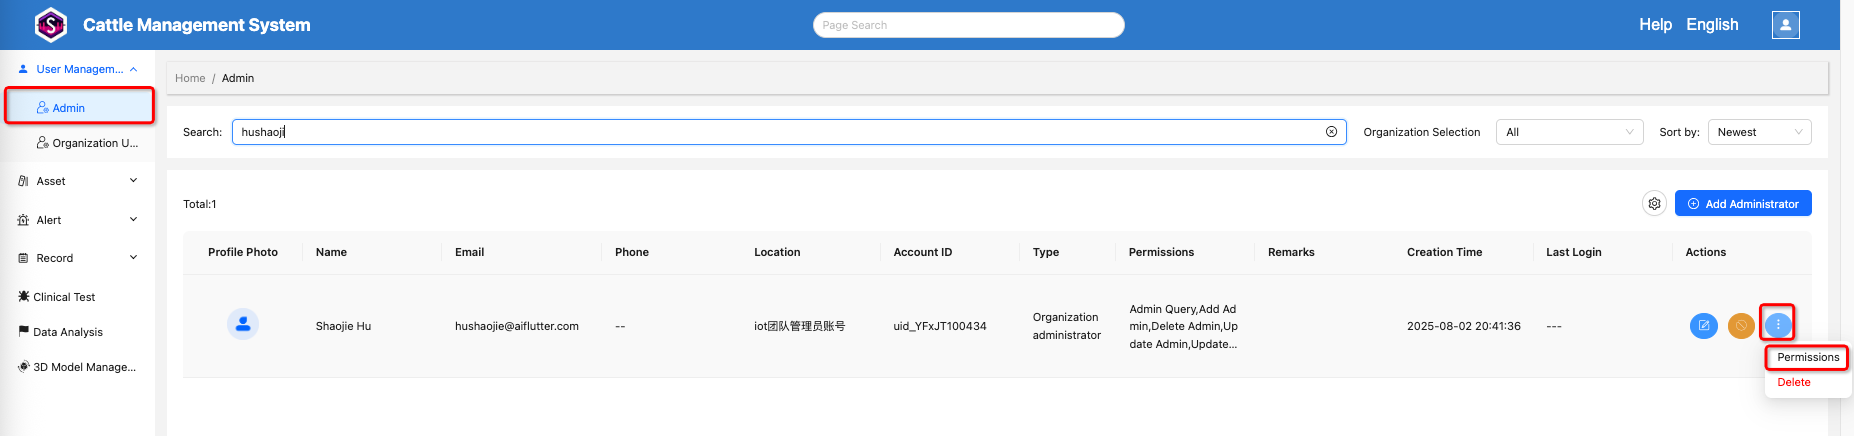
3.3 Permission Configuration
Only administrator accounts support permission configuration.
In the administrator list, click “More” → “Permissions” in the action column of the target administrator to assign corresponding permissions.
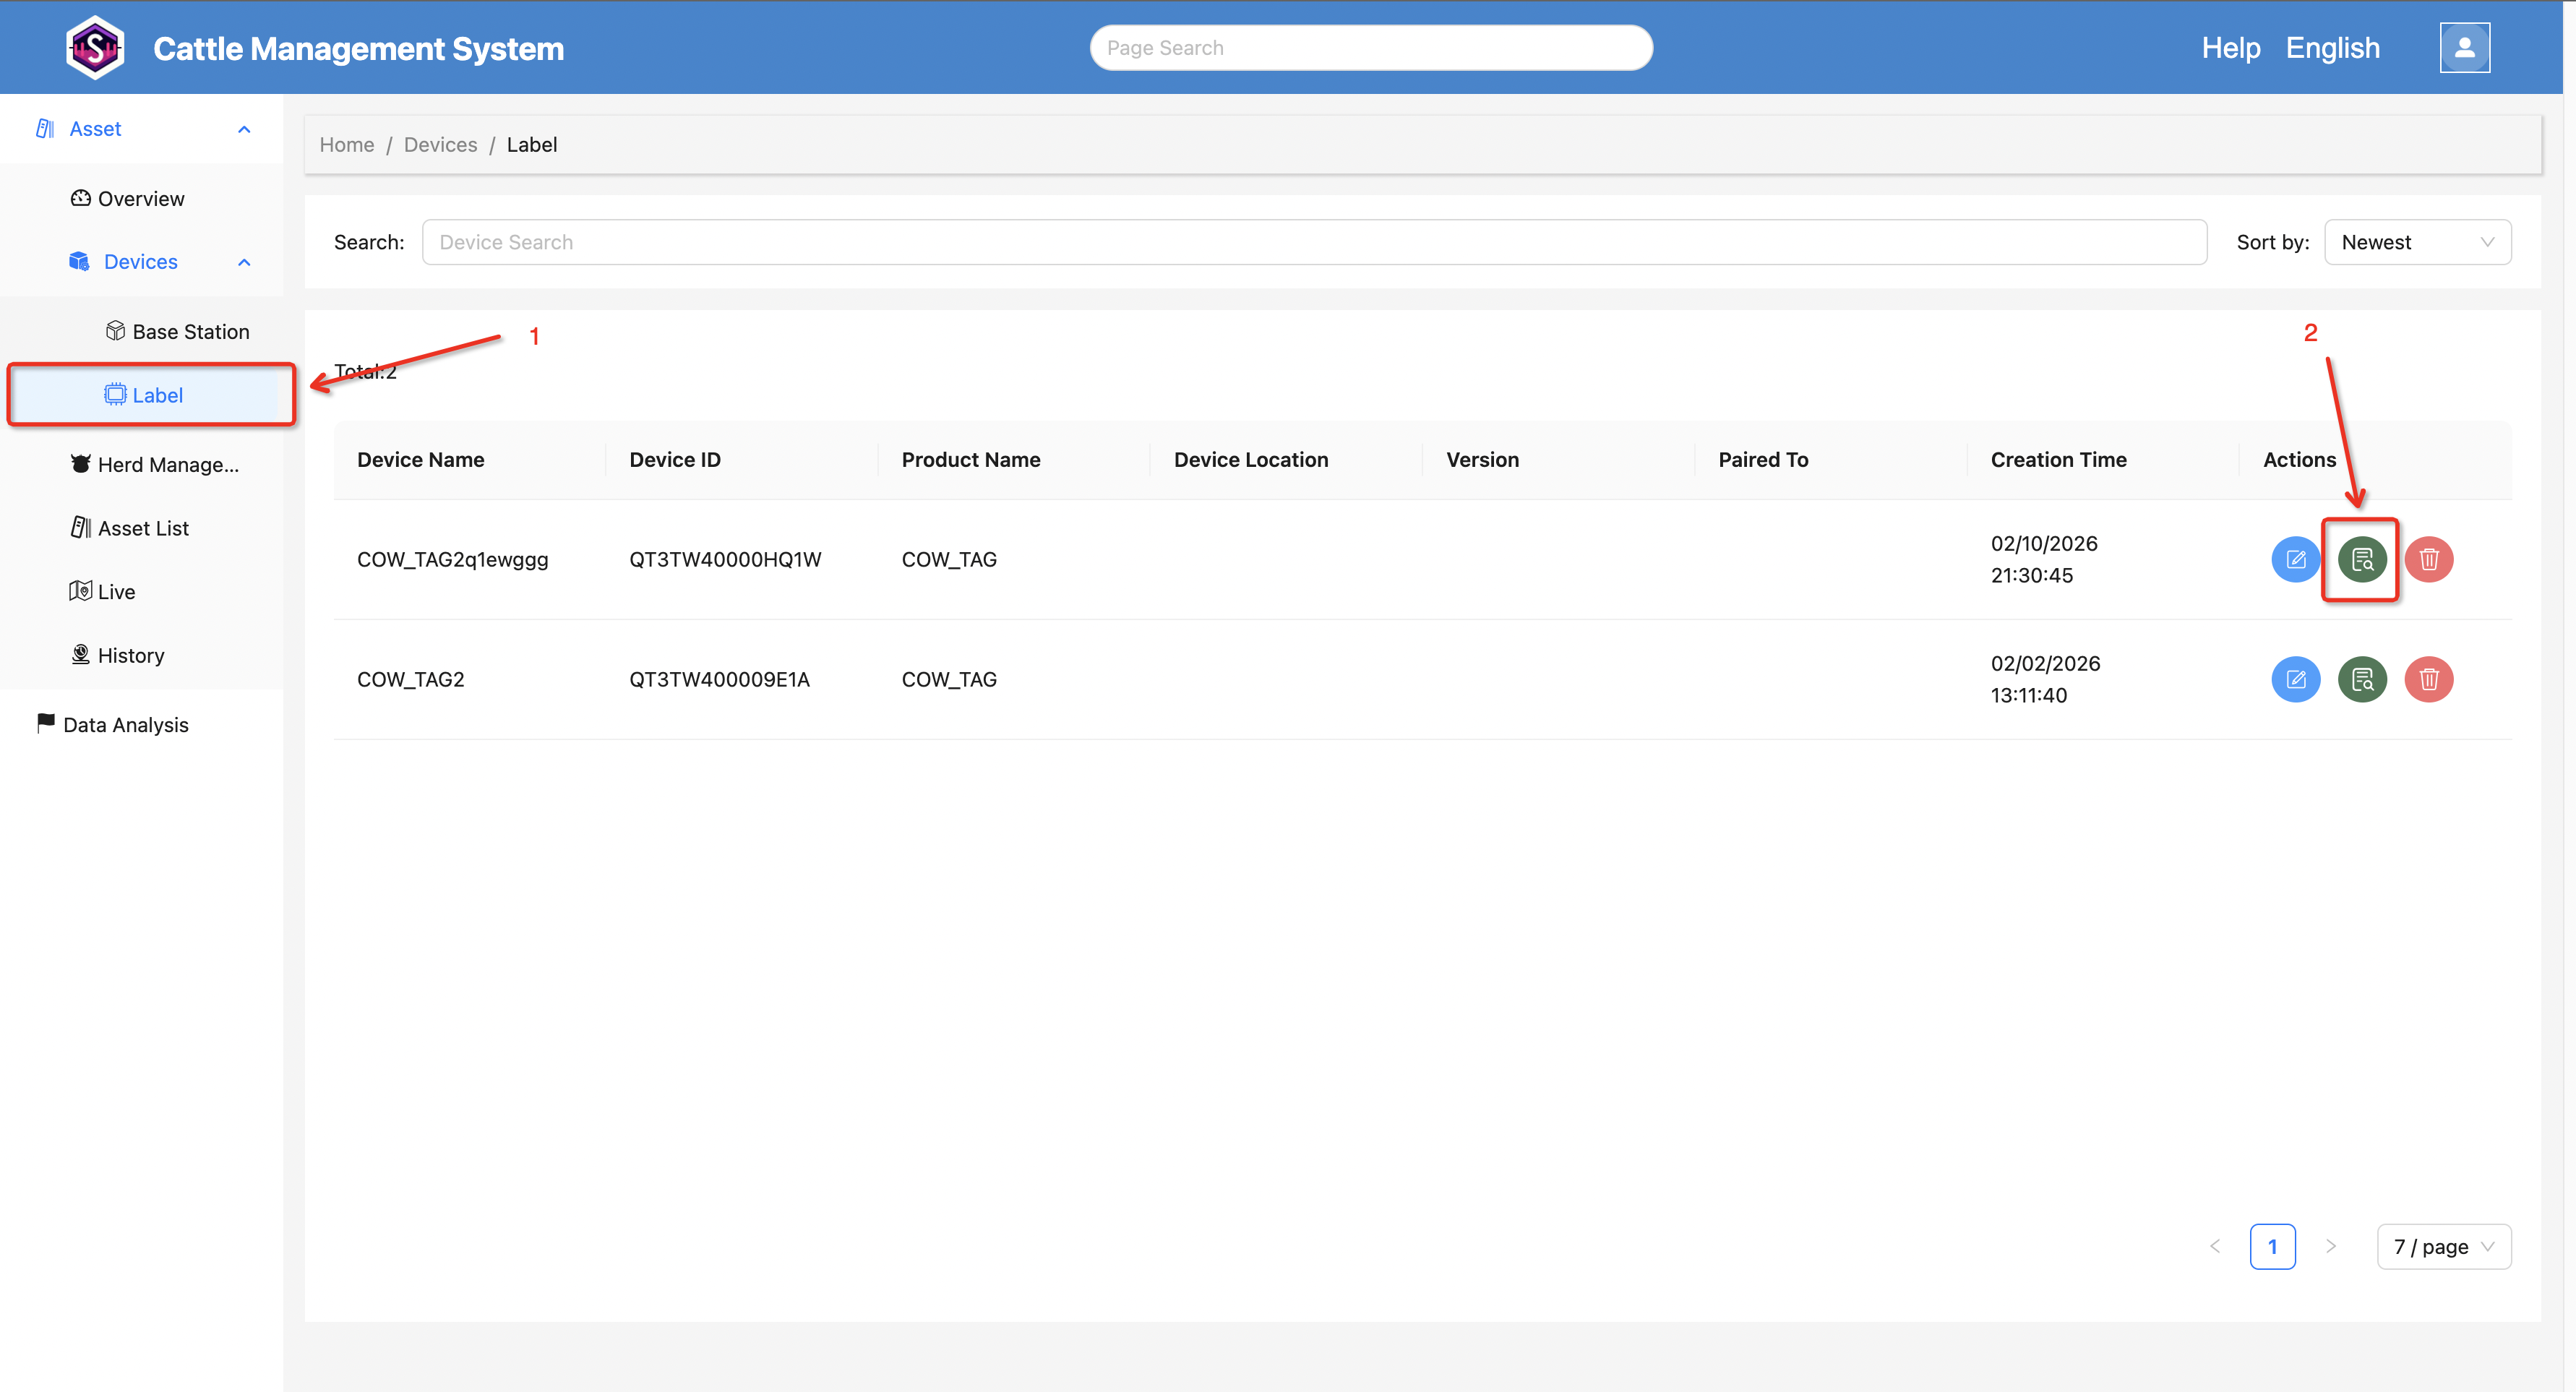
4. Device Management
After entering the platform, navigate to:
Asset → Devices → Label
Here, you can view the cattle ear tag device list.
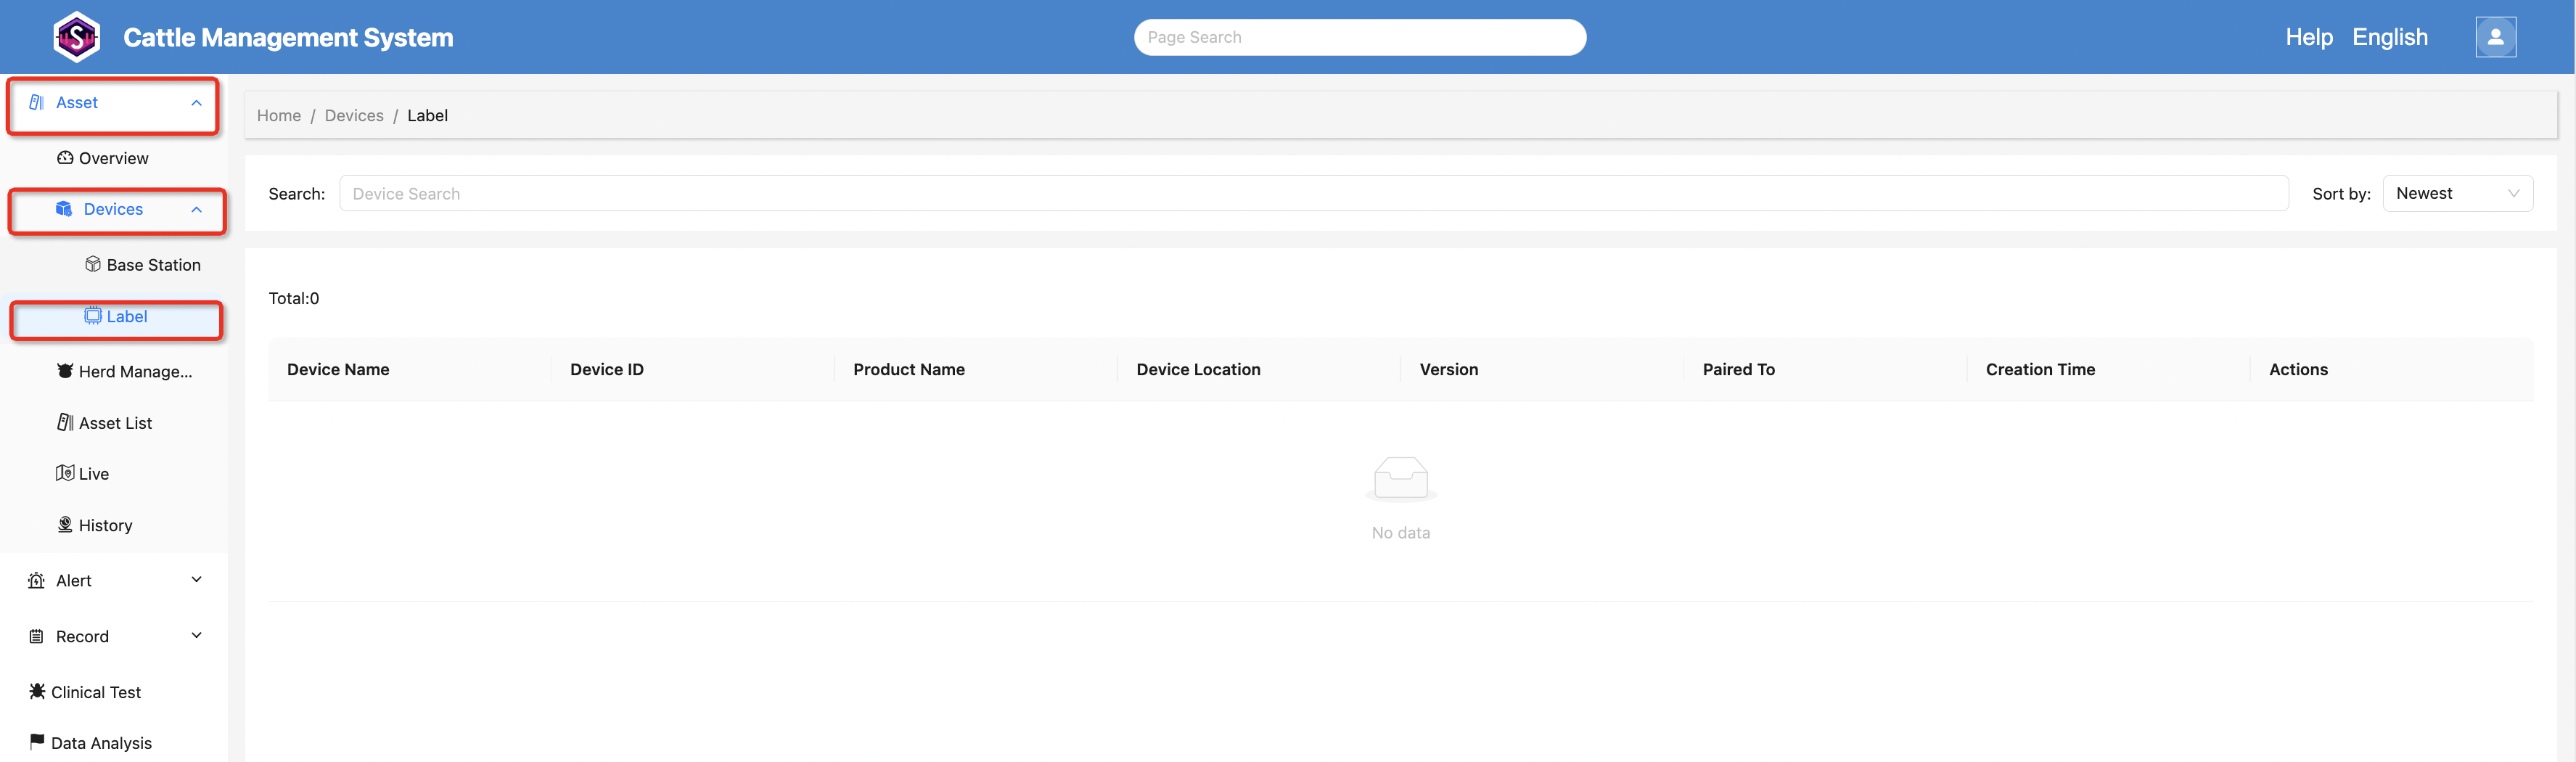
The list displays the following information:
- Device Name
- Device ID
- Device Location
- Assigned User
- Creation Time
4.1 Viewing Device Data
In the device list, click the “View” button for a specific device to check its measurement data and related records.
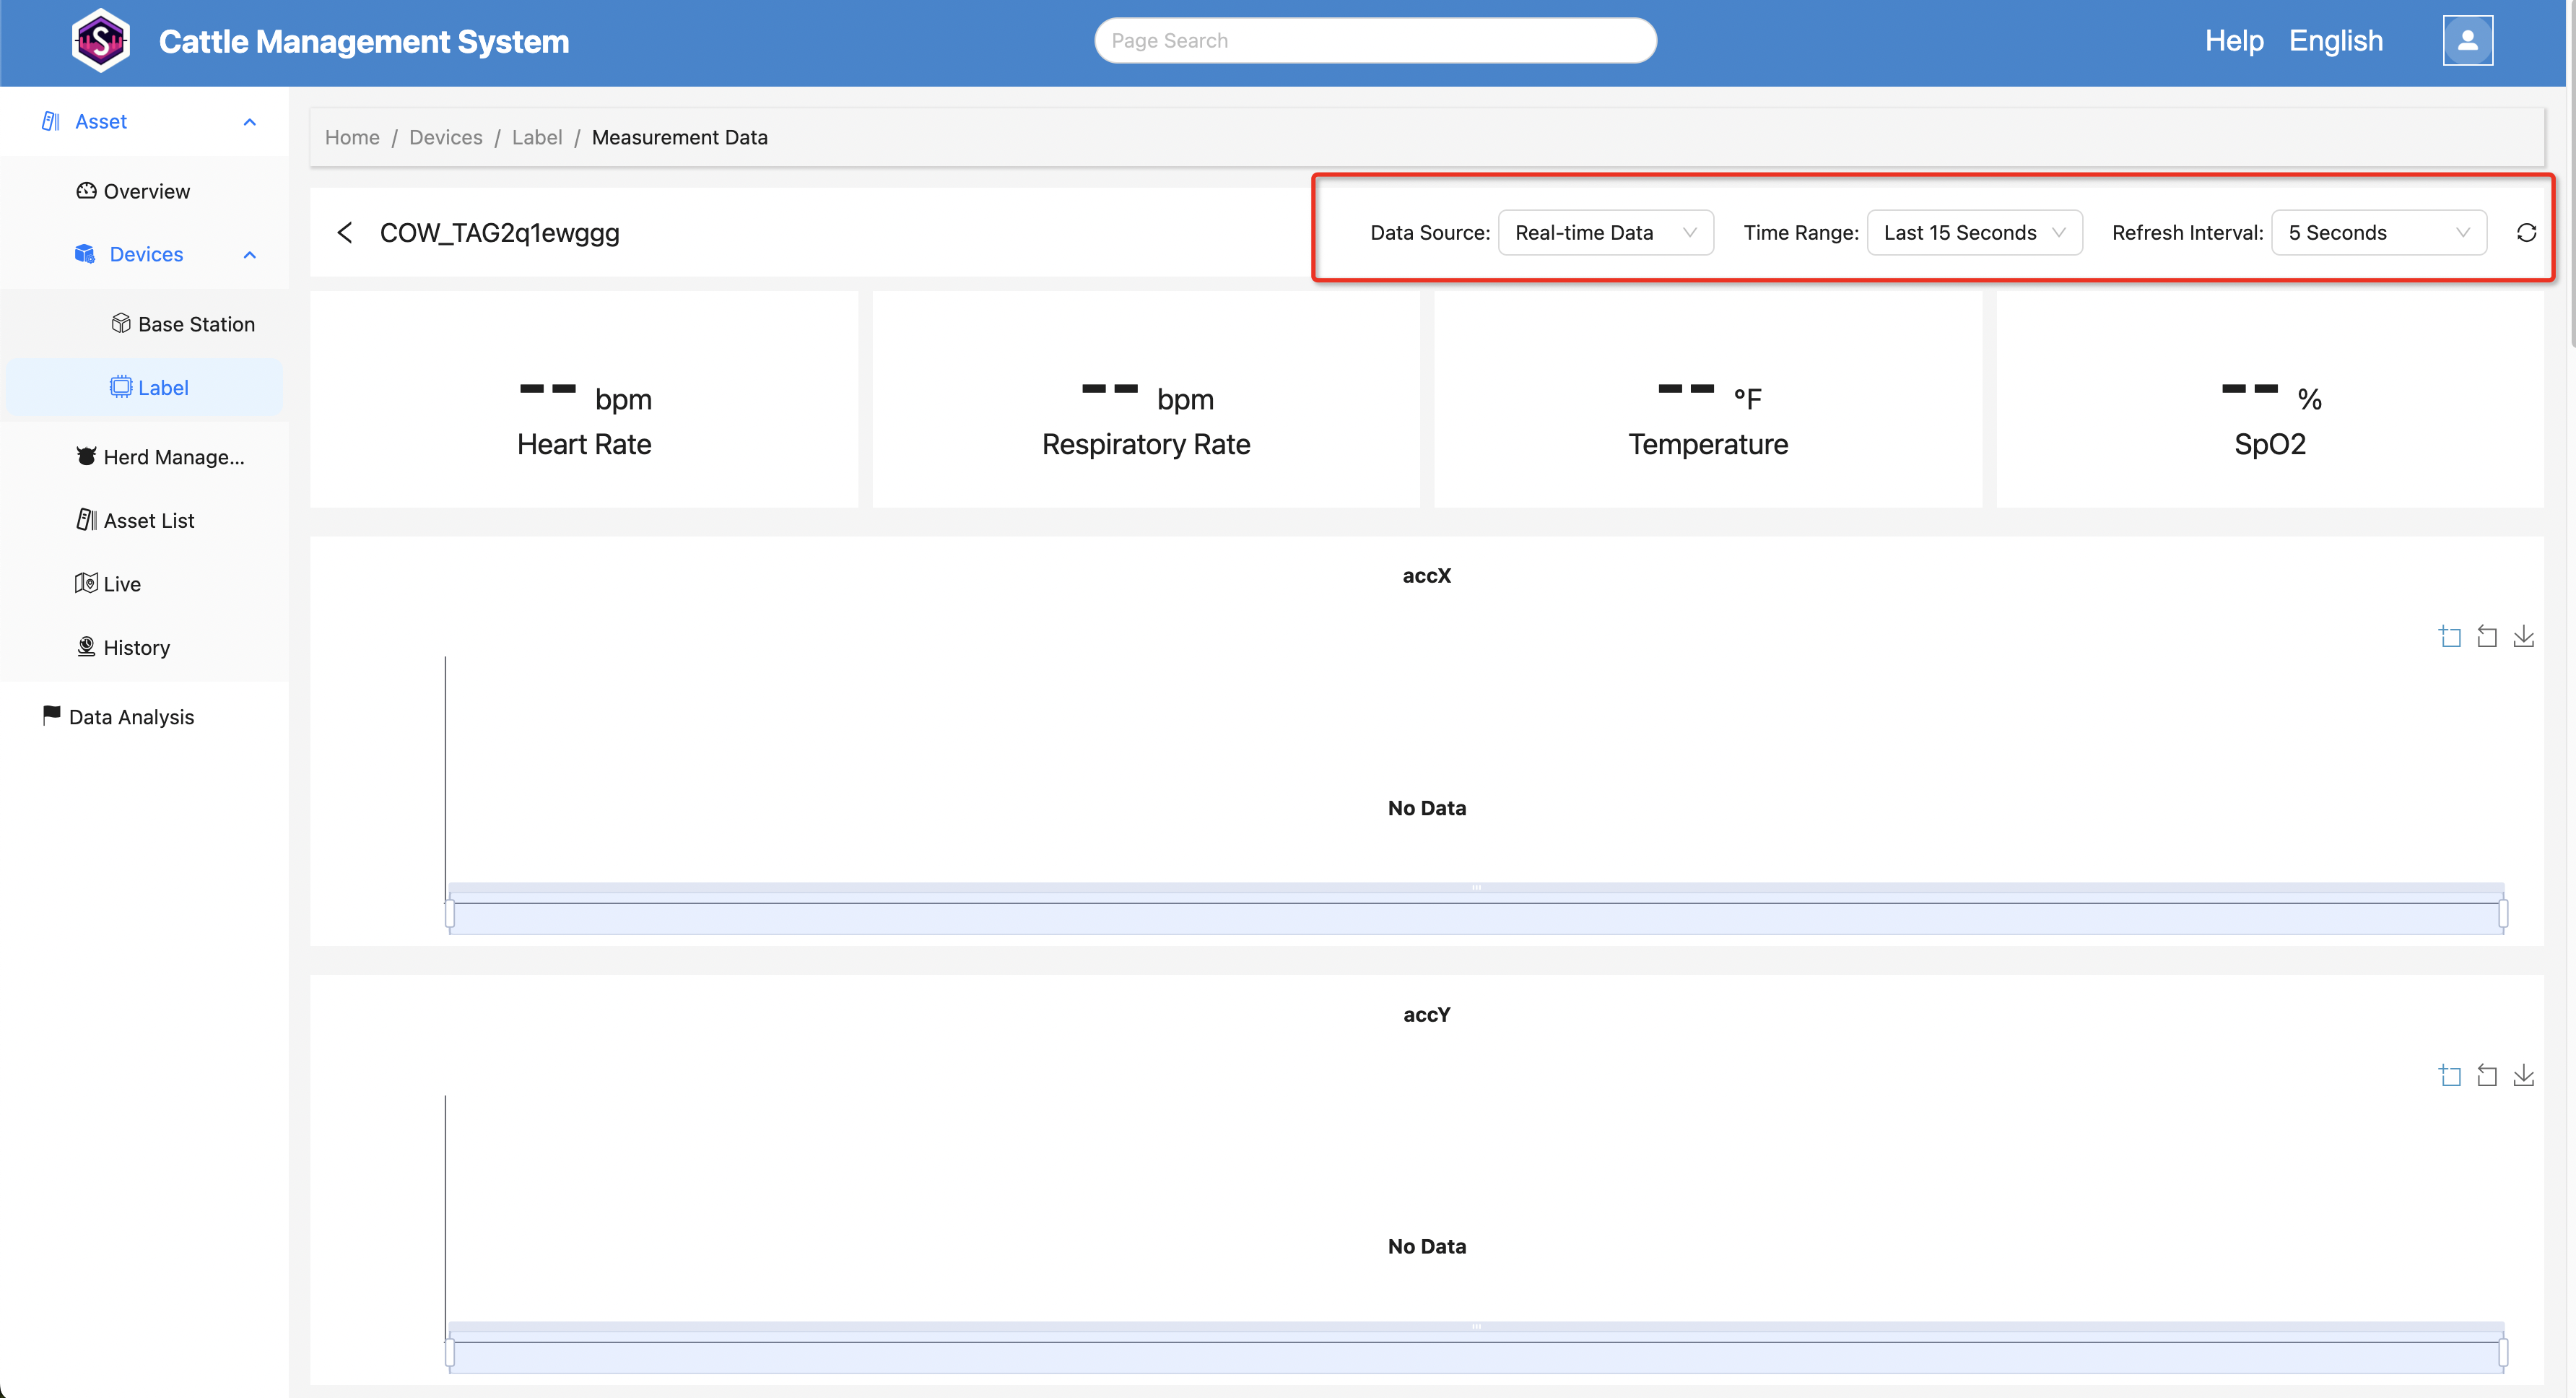
4.2 View Real-Time Measurement Data
To monitor data during measurement:
- Set Data Source to Real-Time Data
- Set Time Range to 30 seconds
Note: Ear tag data is not uploaded continuously in real time, so the time range can be increased appropriately.
The page will automatically refresh data at regular intervals.
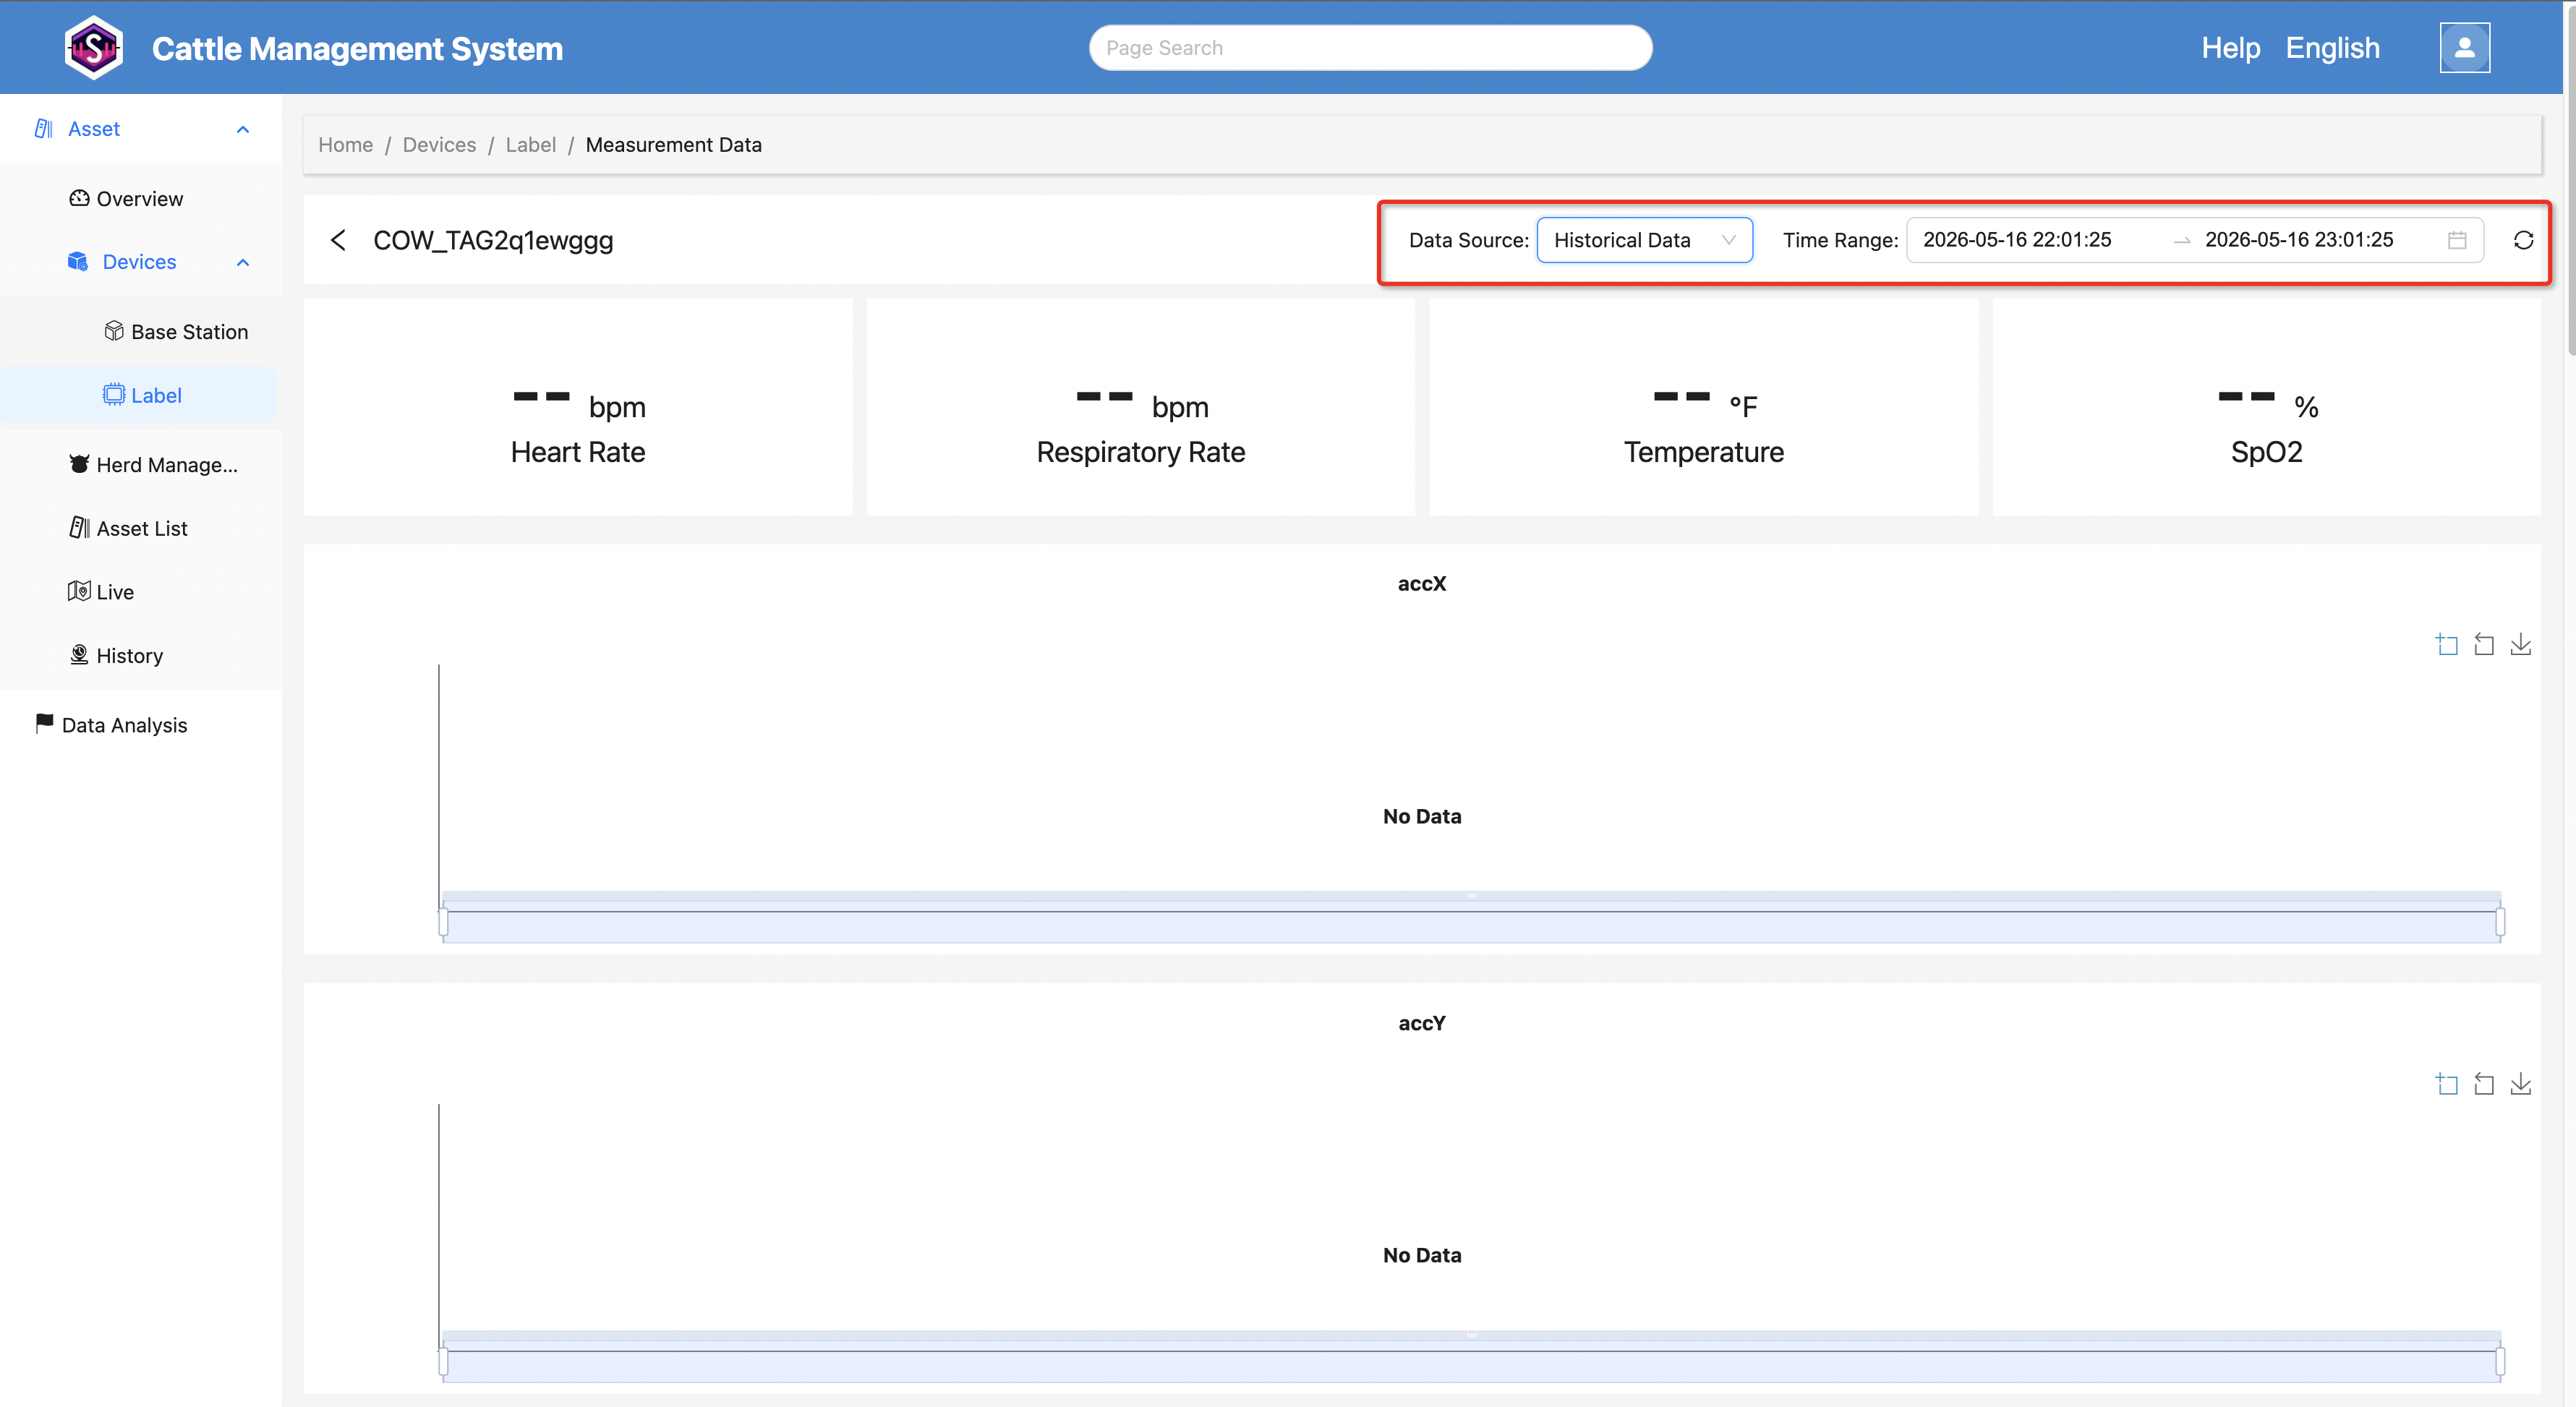
4.3 View Historical Data
After measurement is completed, historical data can be checked as follows:
- Change Data Source to Historical Data
- Select the desired Time Range
- View the historical measurement data
5. Cattle Management
Navigate to:
Asset → Cattle
to view the cattle list of the current organization.
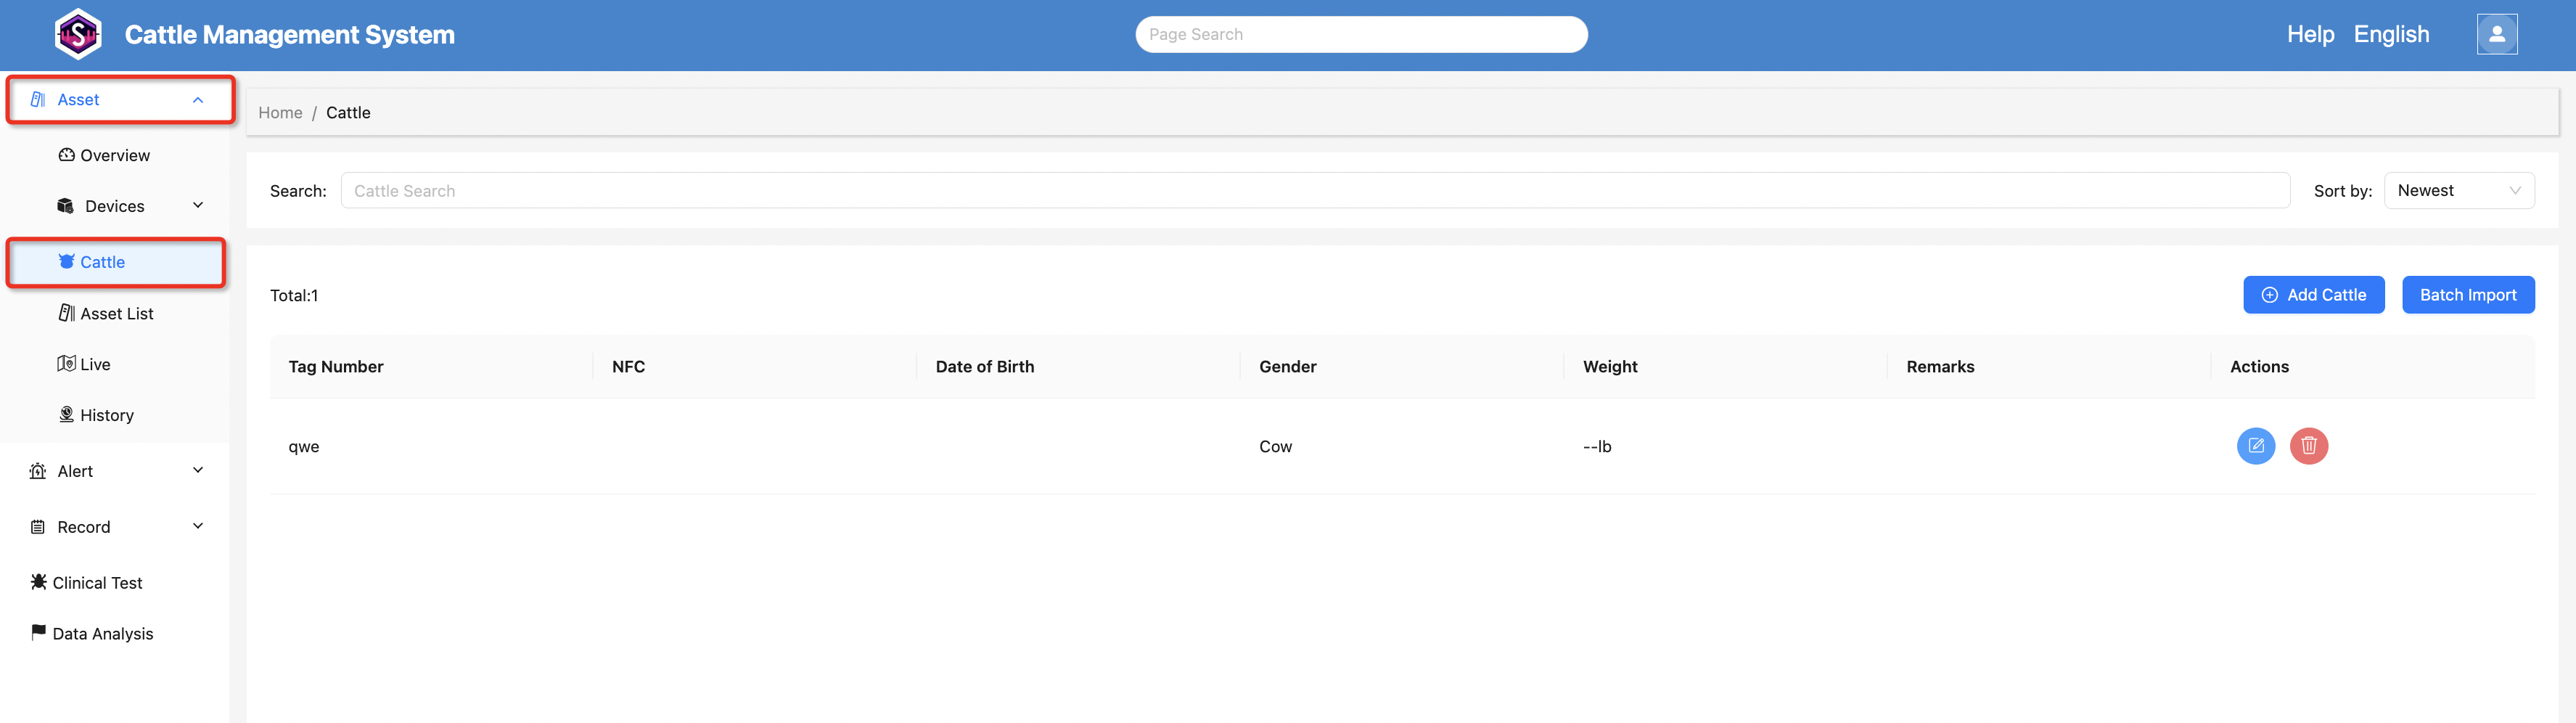
5.1 Adding Cattle
The system supports both individual cattle creation and bulk import.
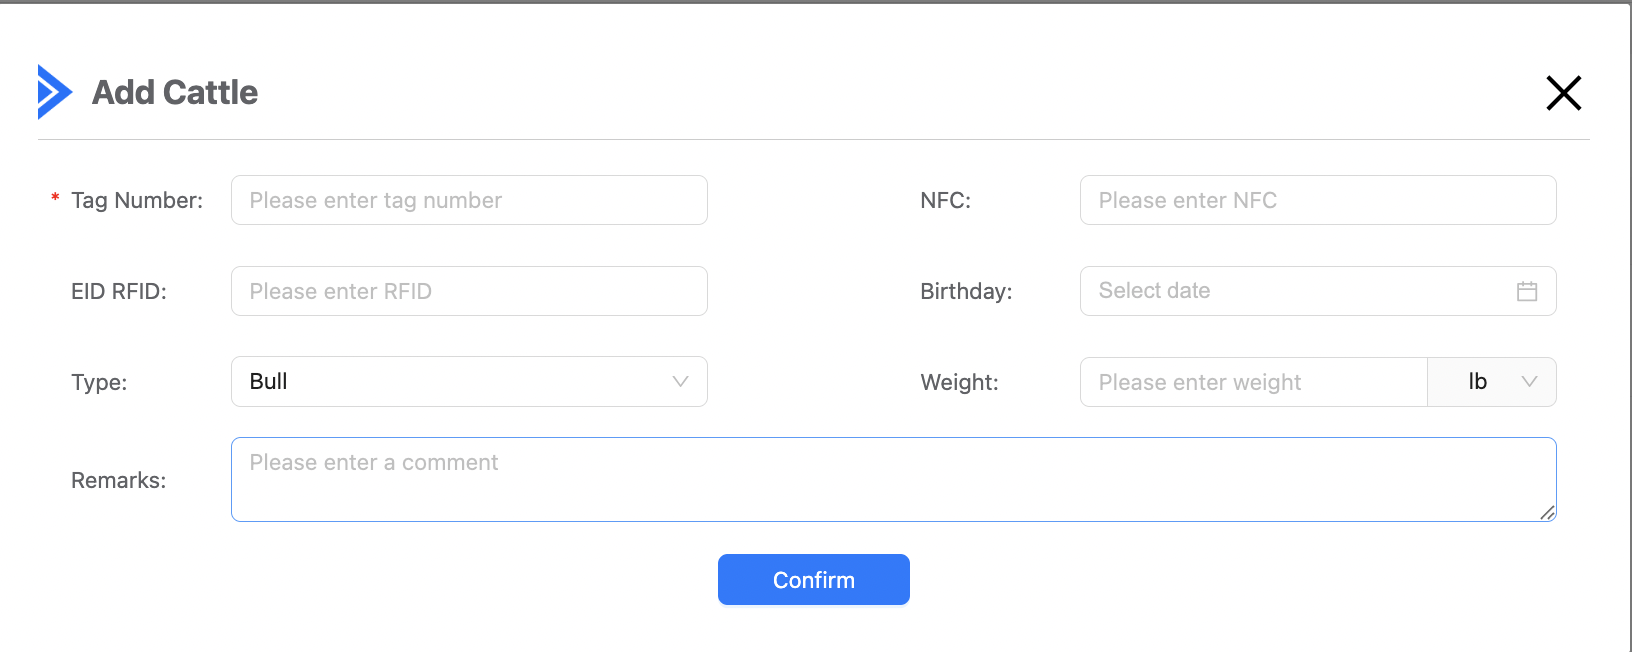
Add a Single Cattle
Click the “Add Cattle” button in the top-right corner of the list page.
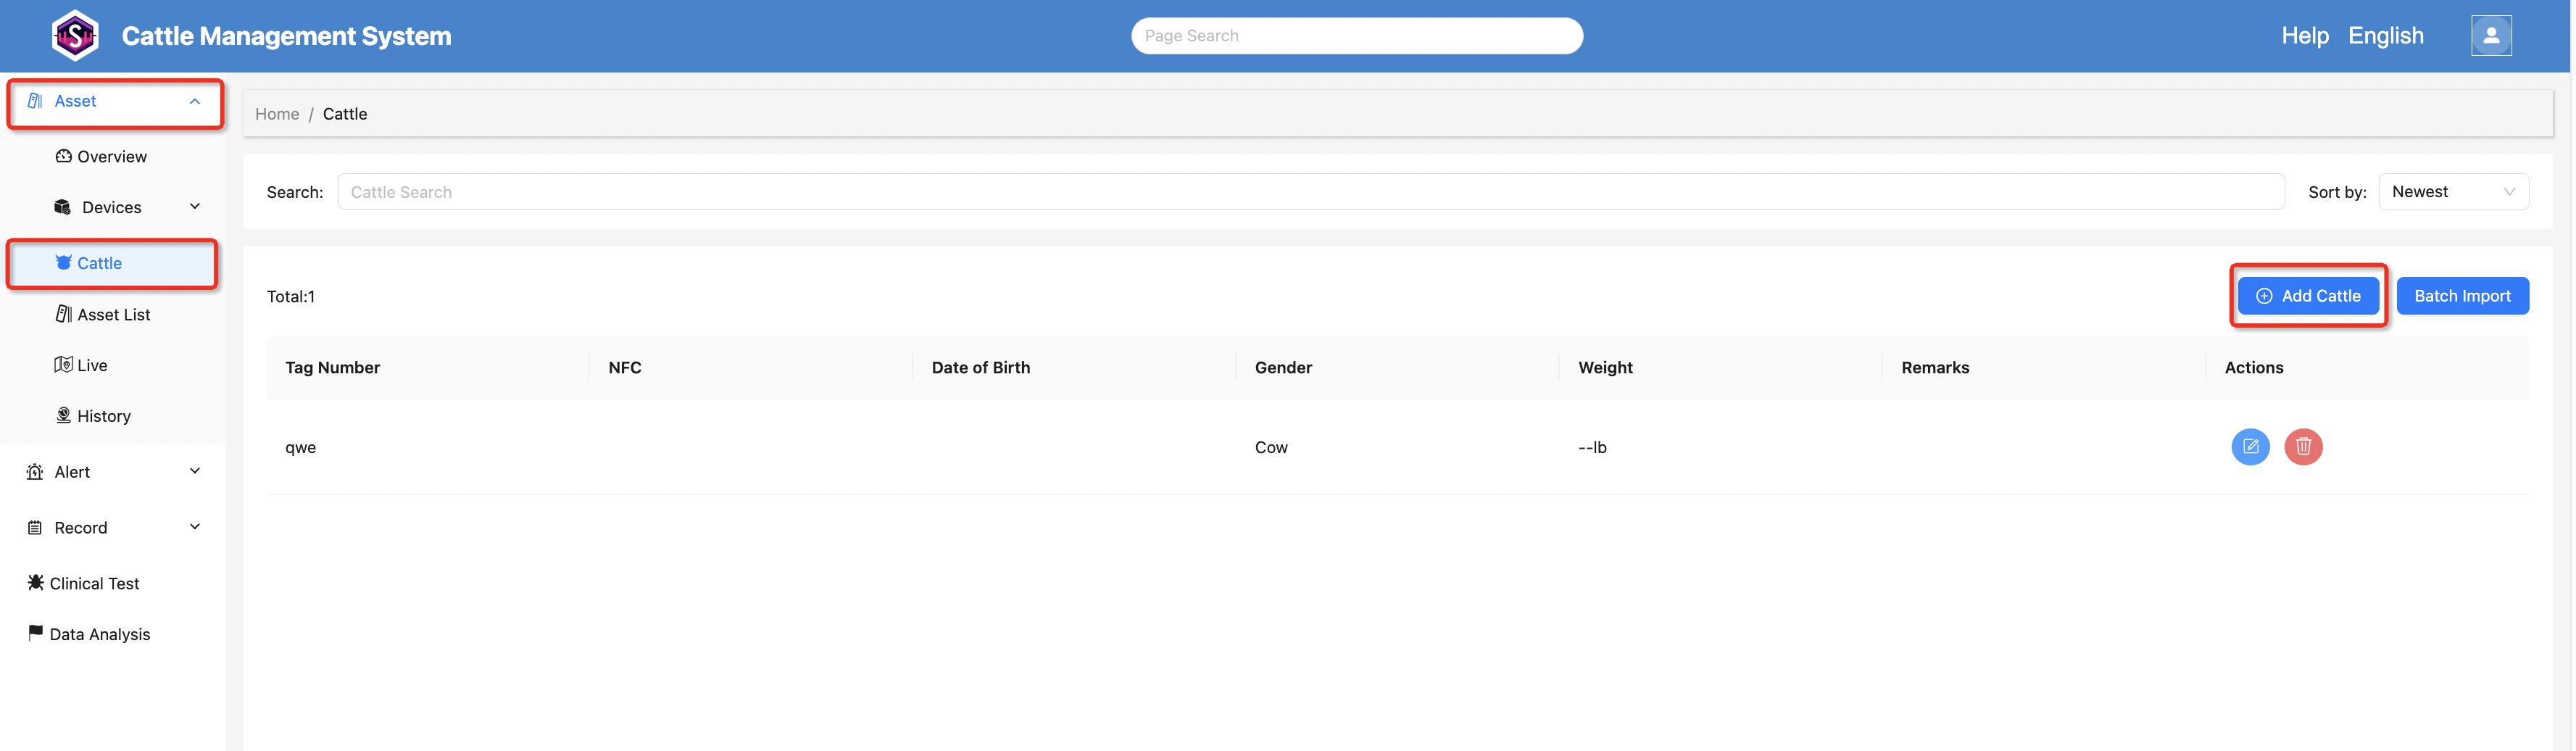
A dialog window will appear. Fill in the cattle information and click “Save” to complete the creation.
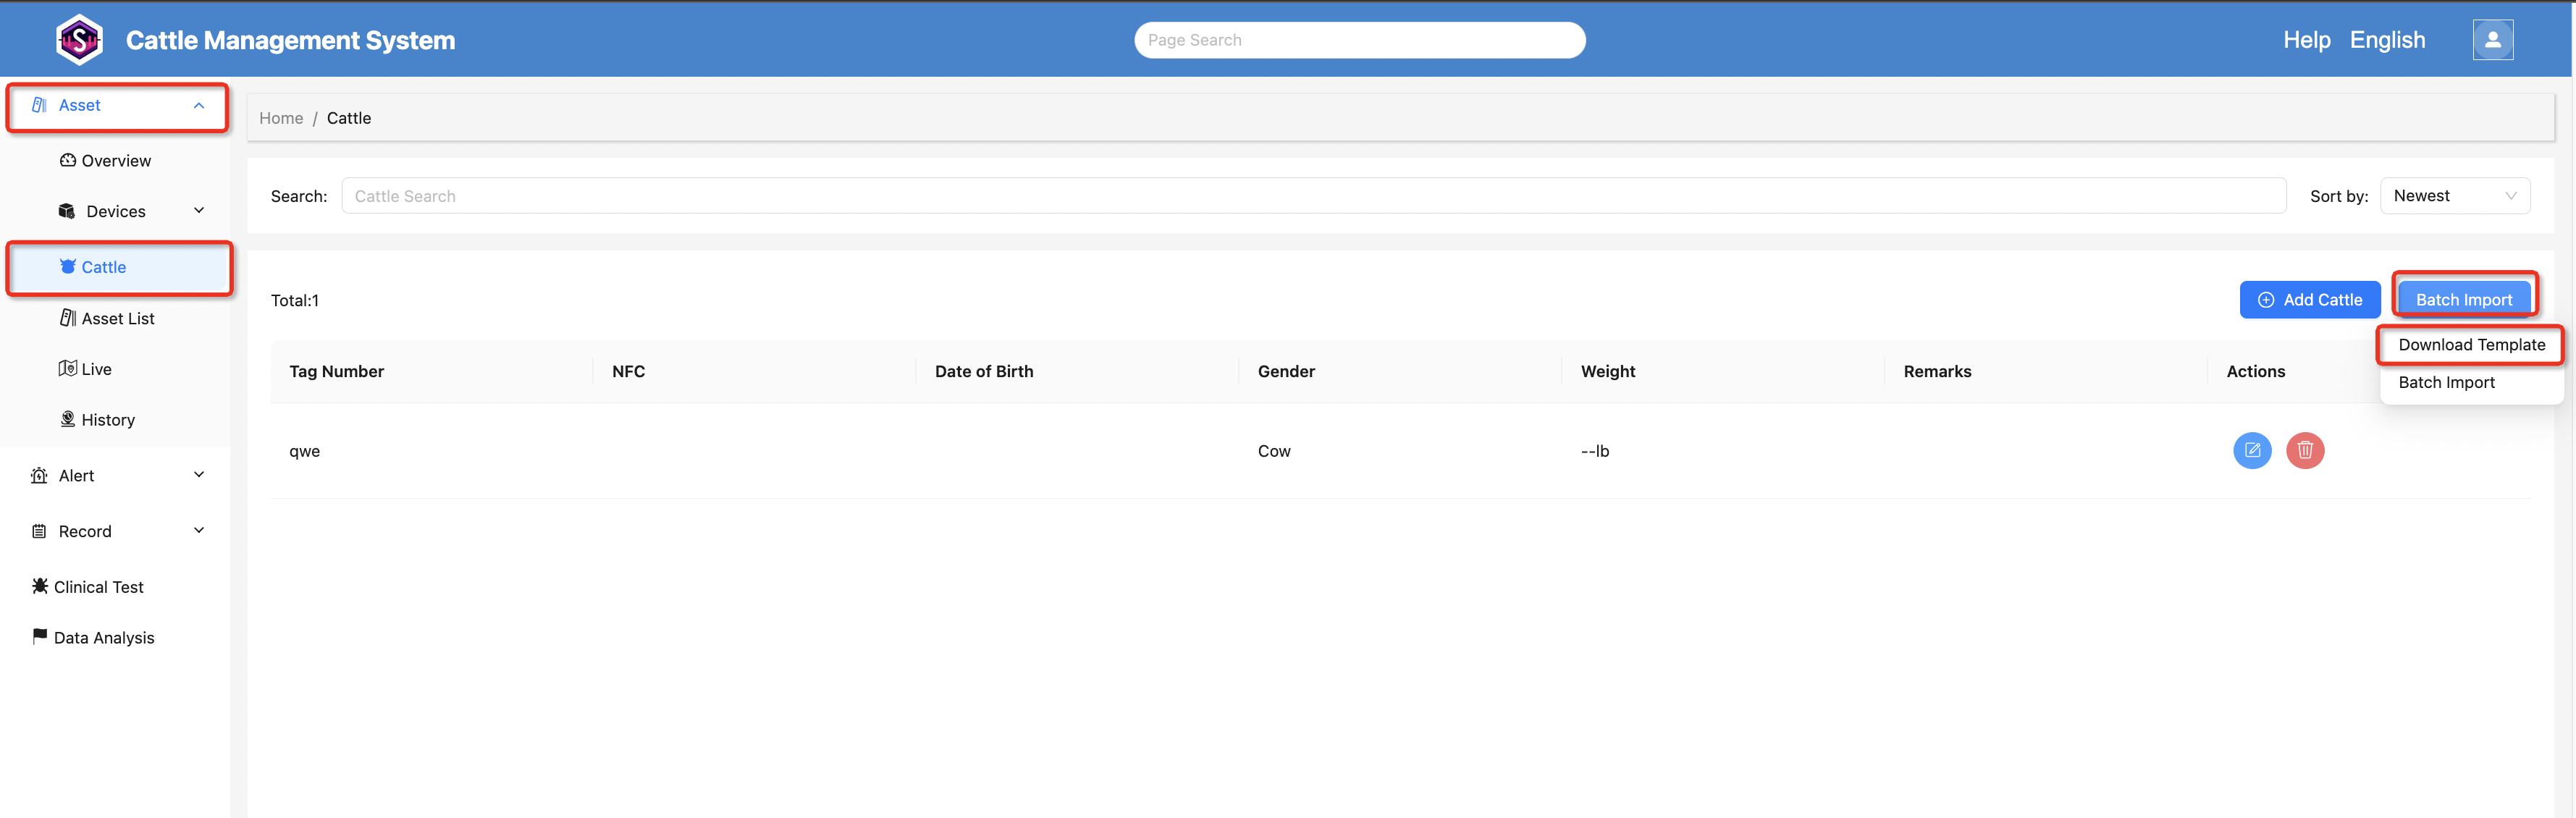
Bulk Import
Click the “Bulk Import” button above the list and select “Download Template” from the dropdown menu.
After downloading the Excel template, fill in the cattle information according to the required format.
Once completed:
- Click the “Bulk Import” button
- Select “Bulk Import” from the dropdown menu
- Upload the completed template file
After the upload is successful, the system will automatically import the cattle data in batches.
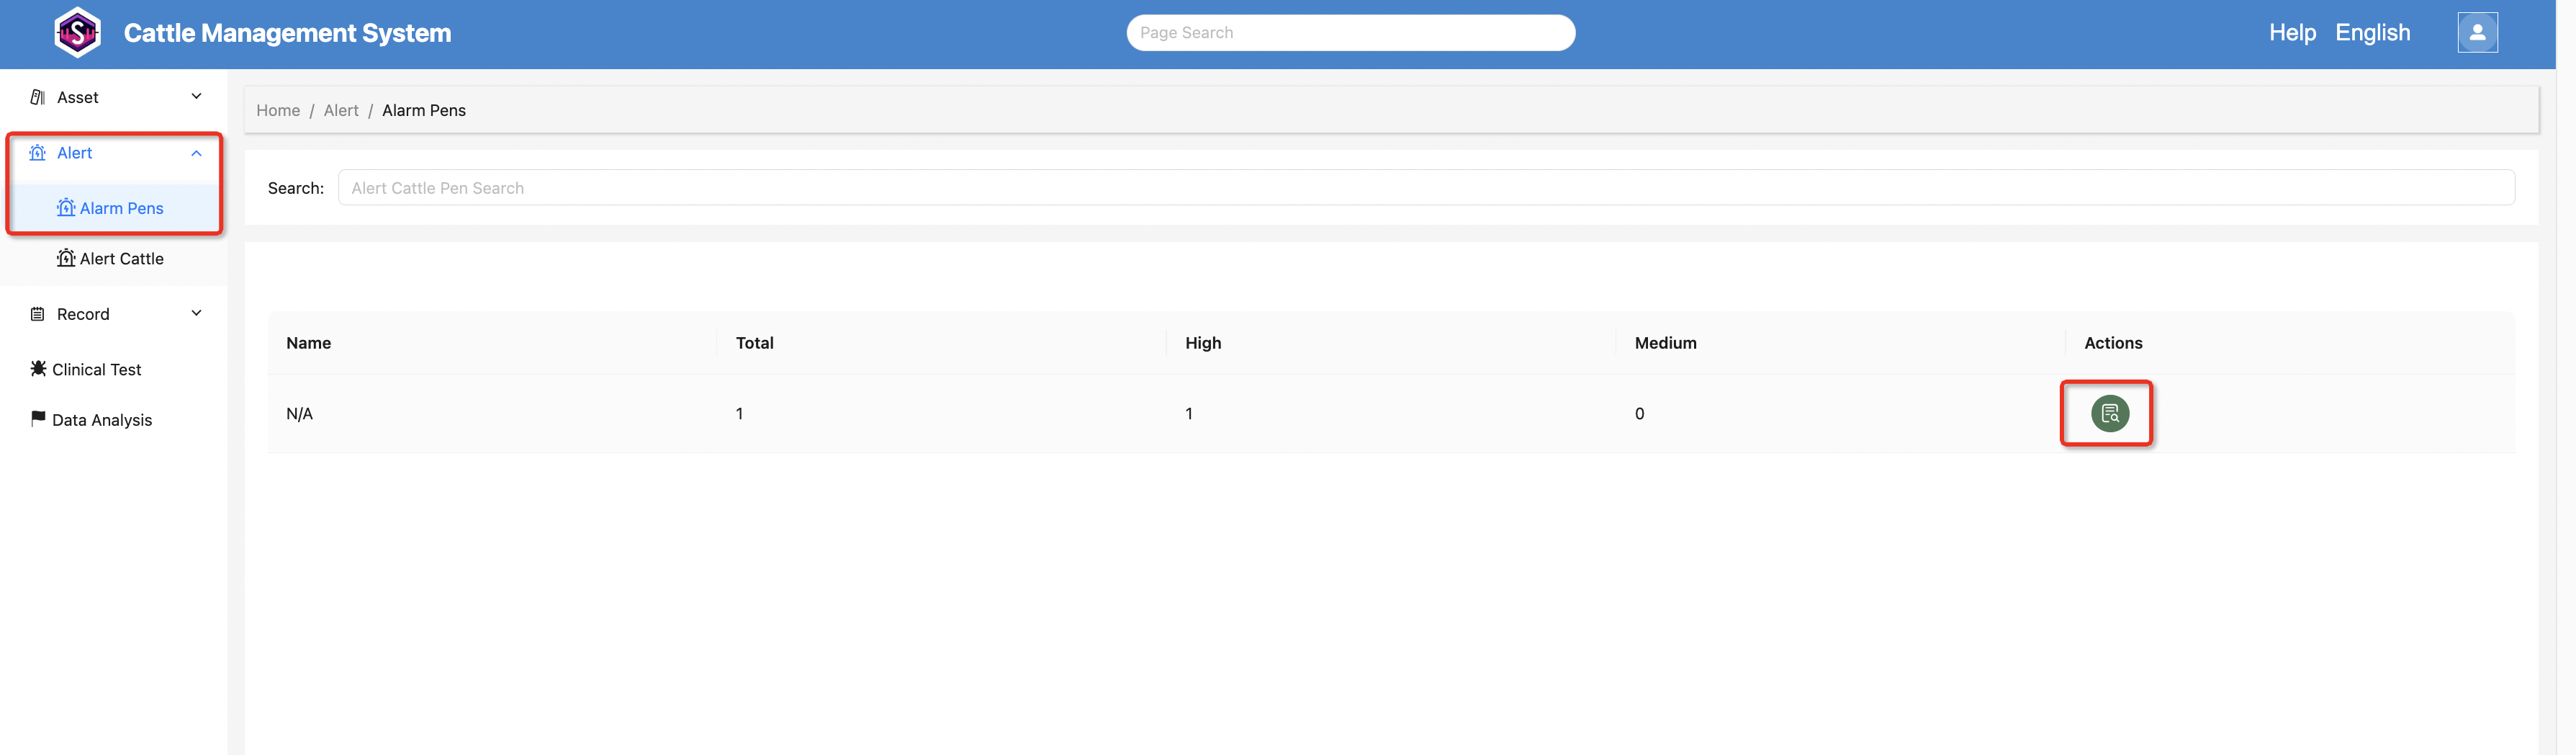
6. Alarm Management
Click “Alarms” in the left-side menu to view:
- Alarm Pens
- Alarm Cattle
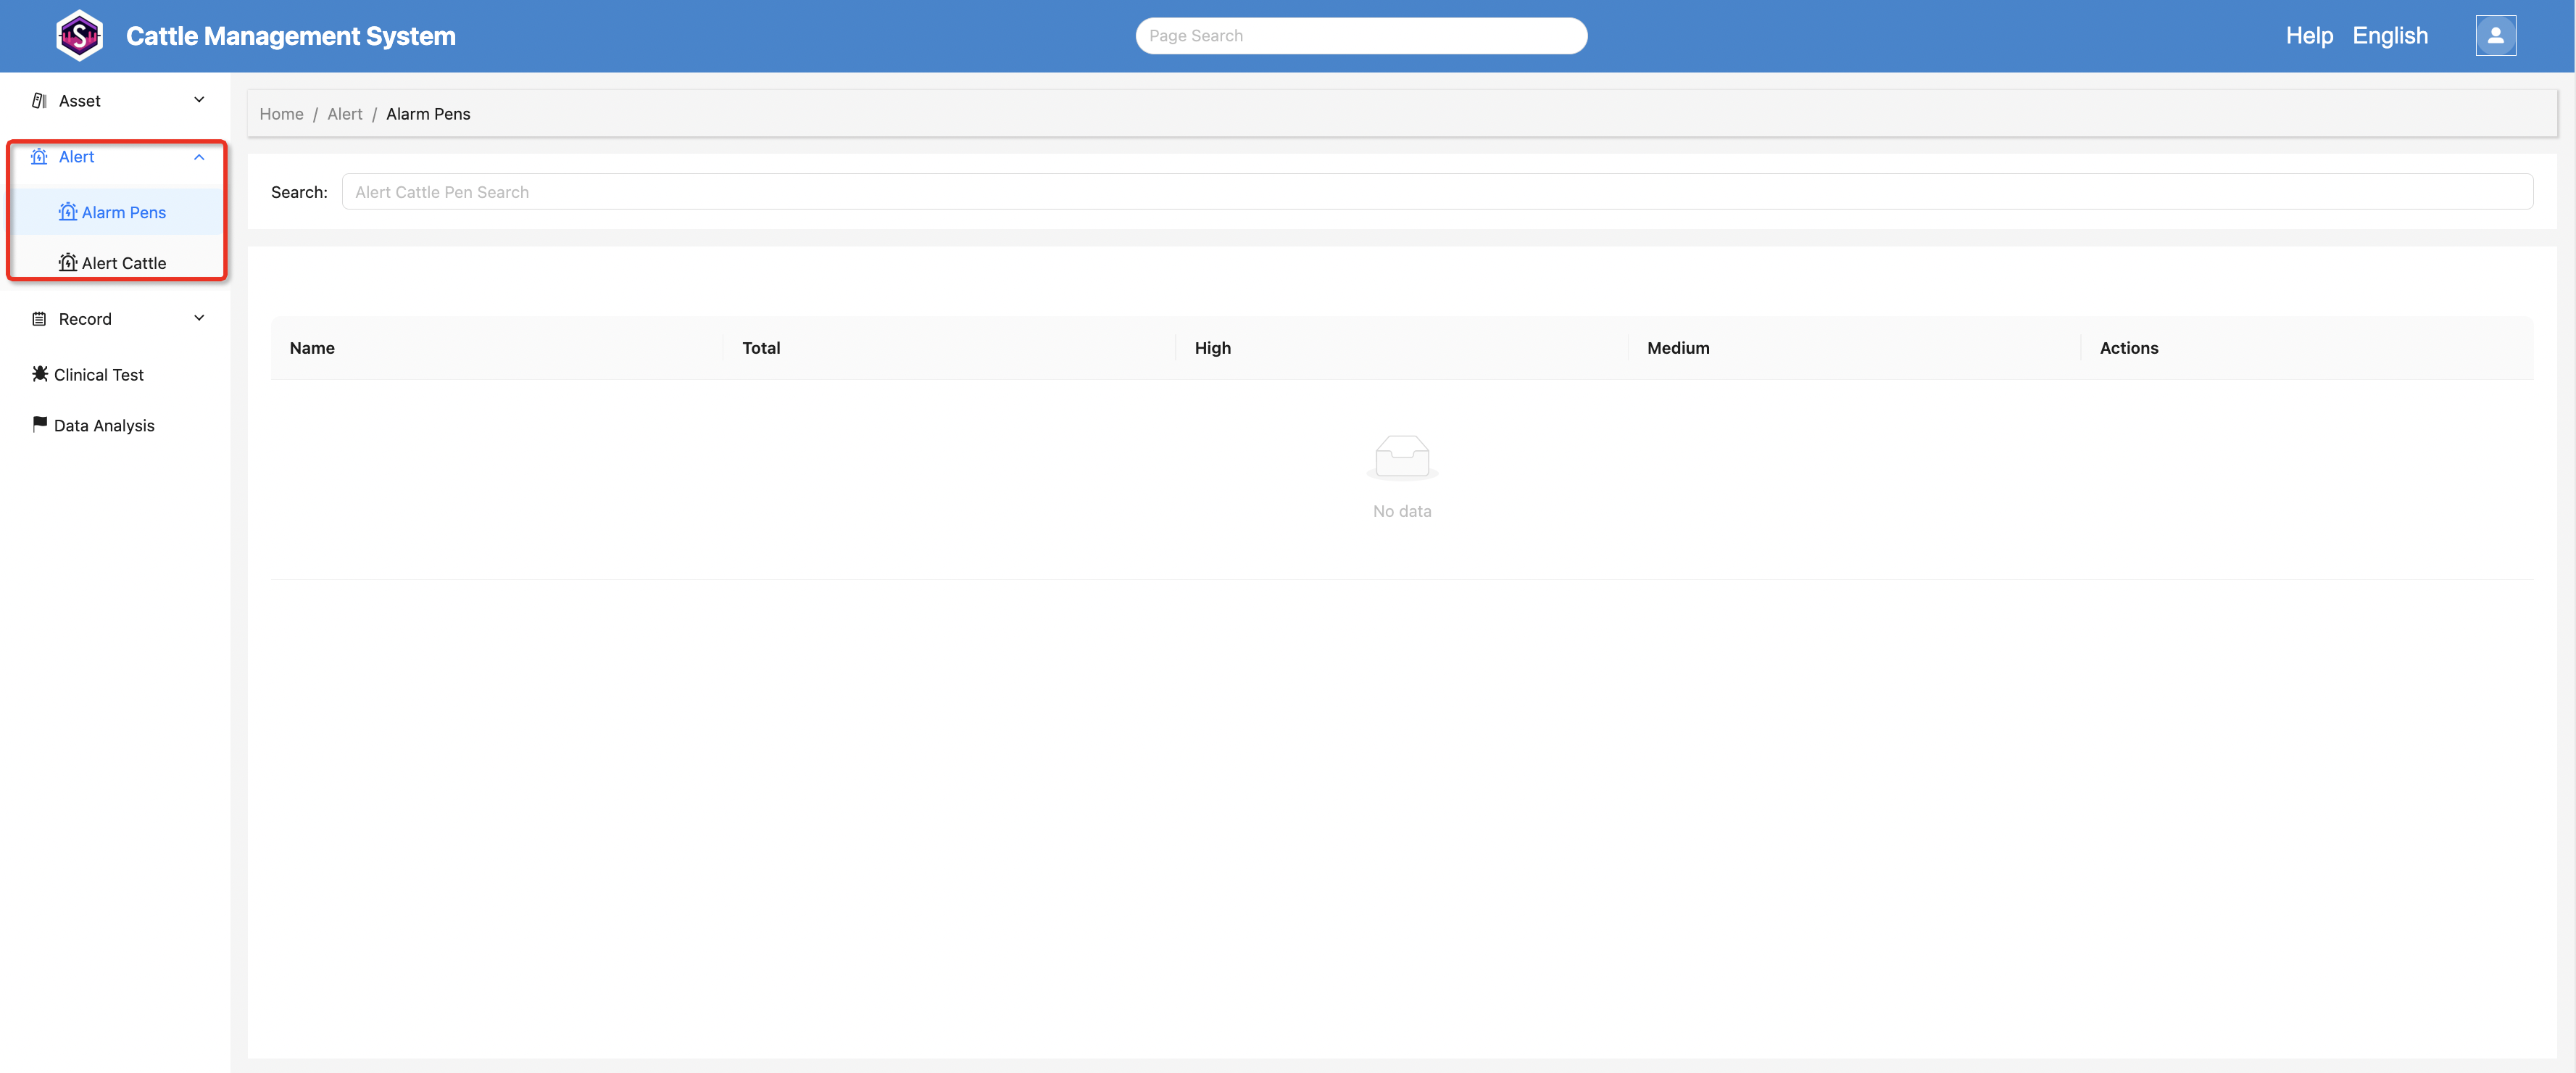
6.1 Alarm Pens
In the Alarm Pens page, you can view:
- Pen Name
- Total Alarm Count
- High-Risk Alarm Count
- Medium-Risk Alarm Count
Click the “View” button for a pen to access its alarm details.
The details page displays:
- Cattle Name
- Symptoms
- Risk Score
- Alarm Level
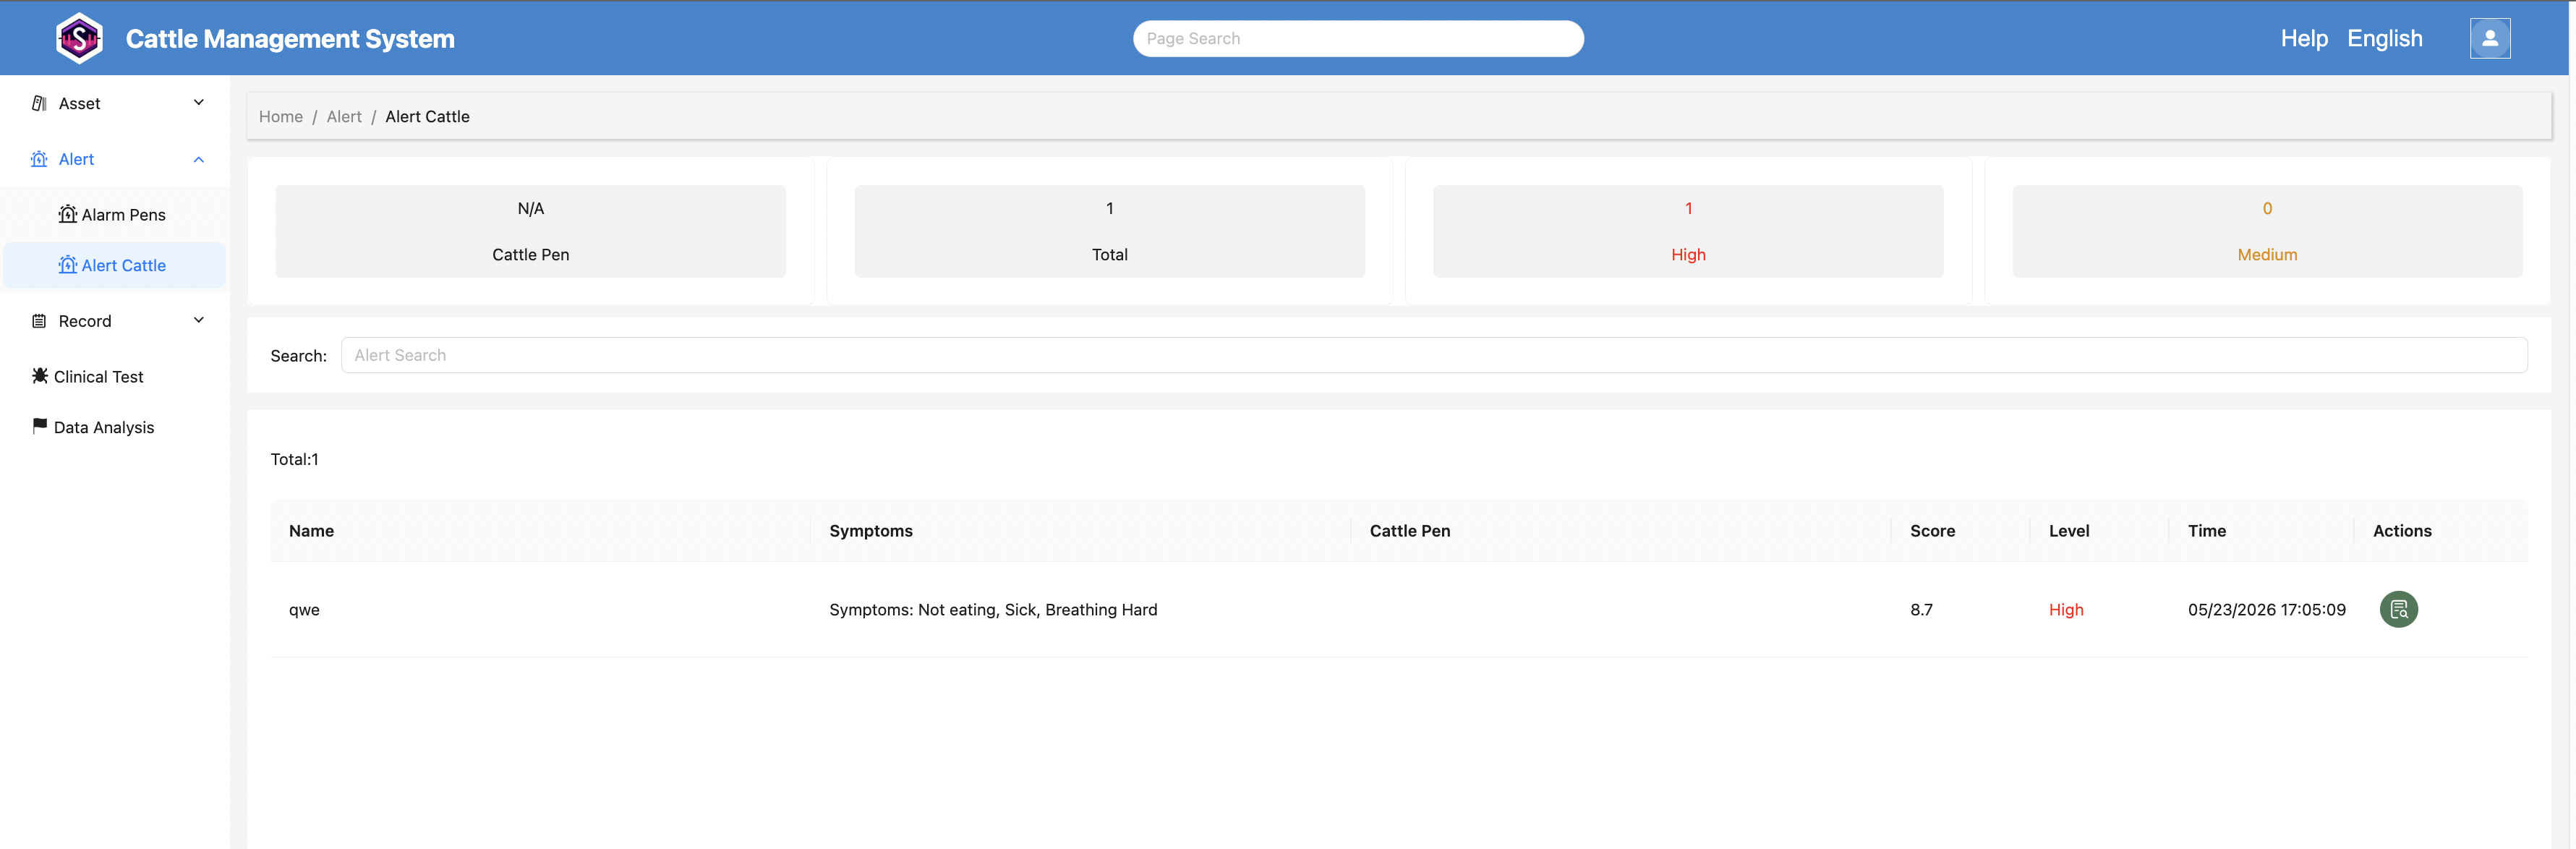
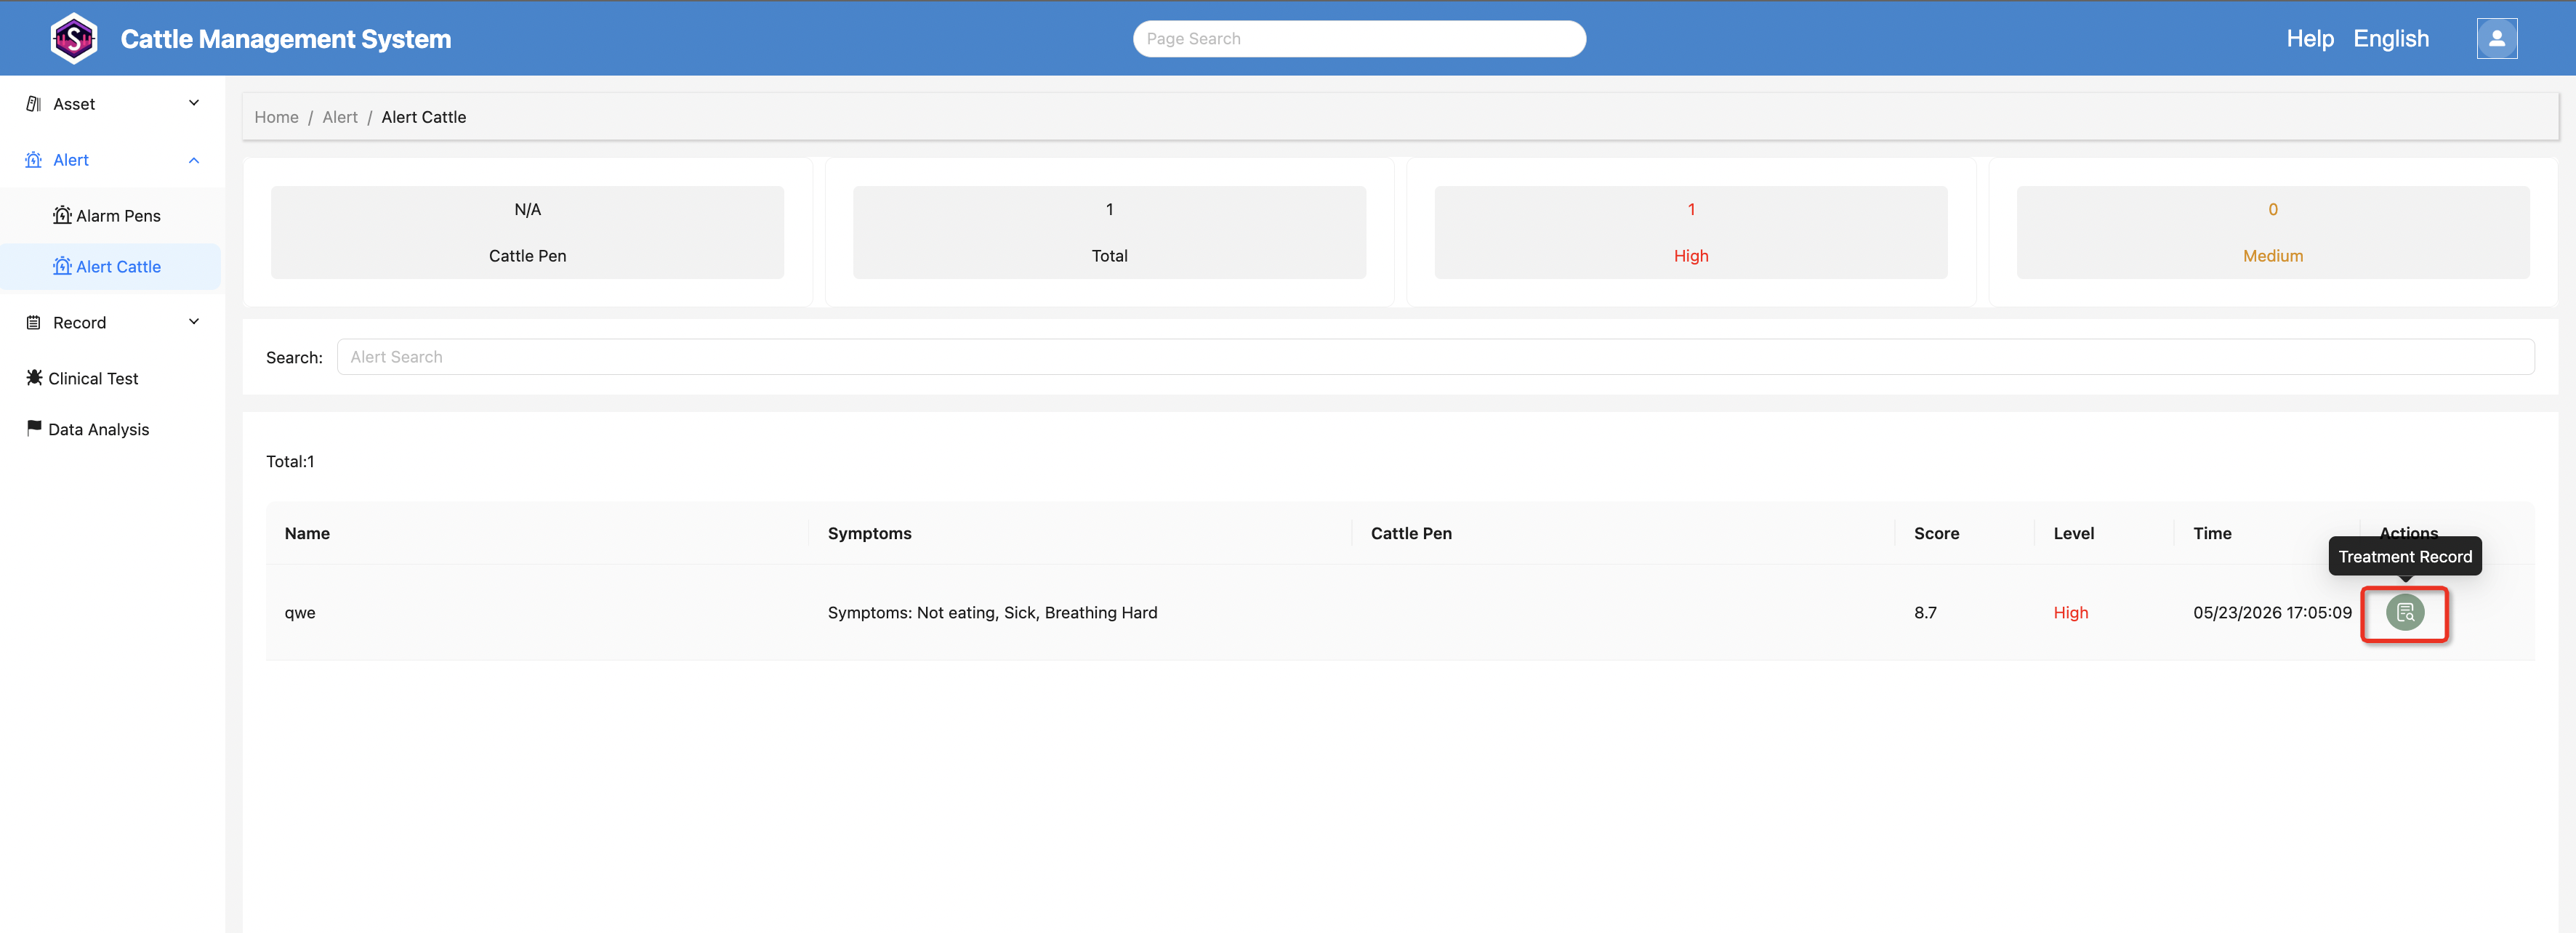
Click the “Treatment Record” button in the list to jump to the treatment records page for the selected cattle.

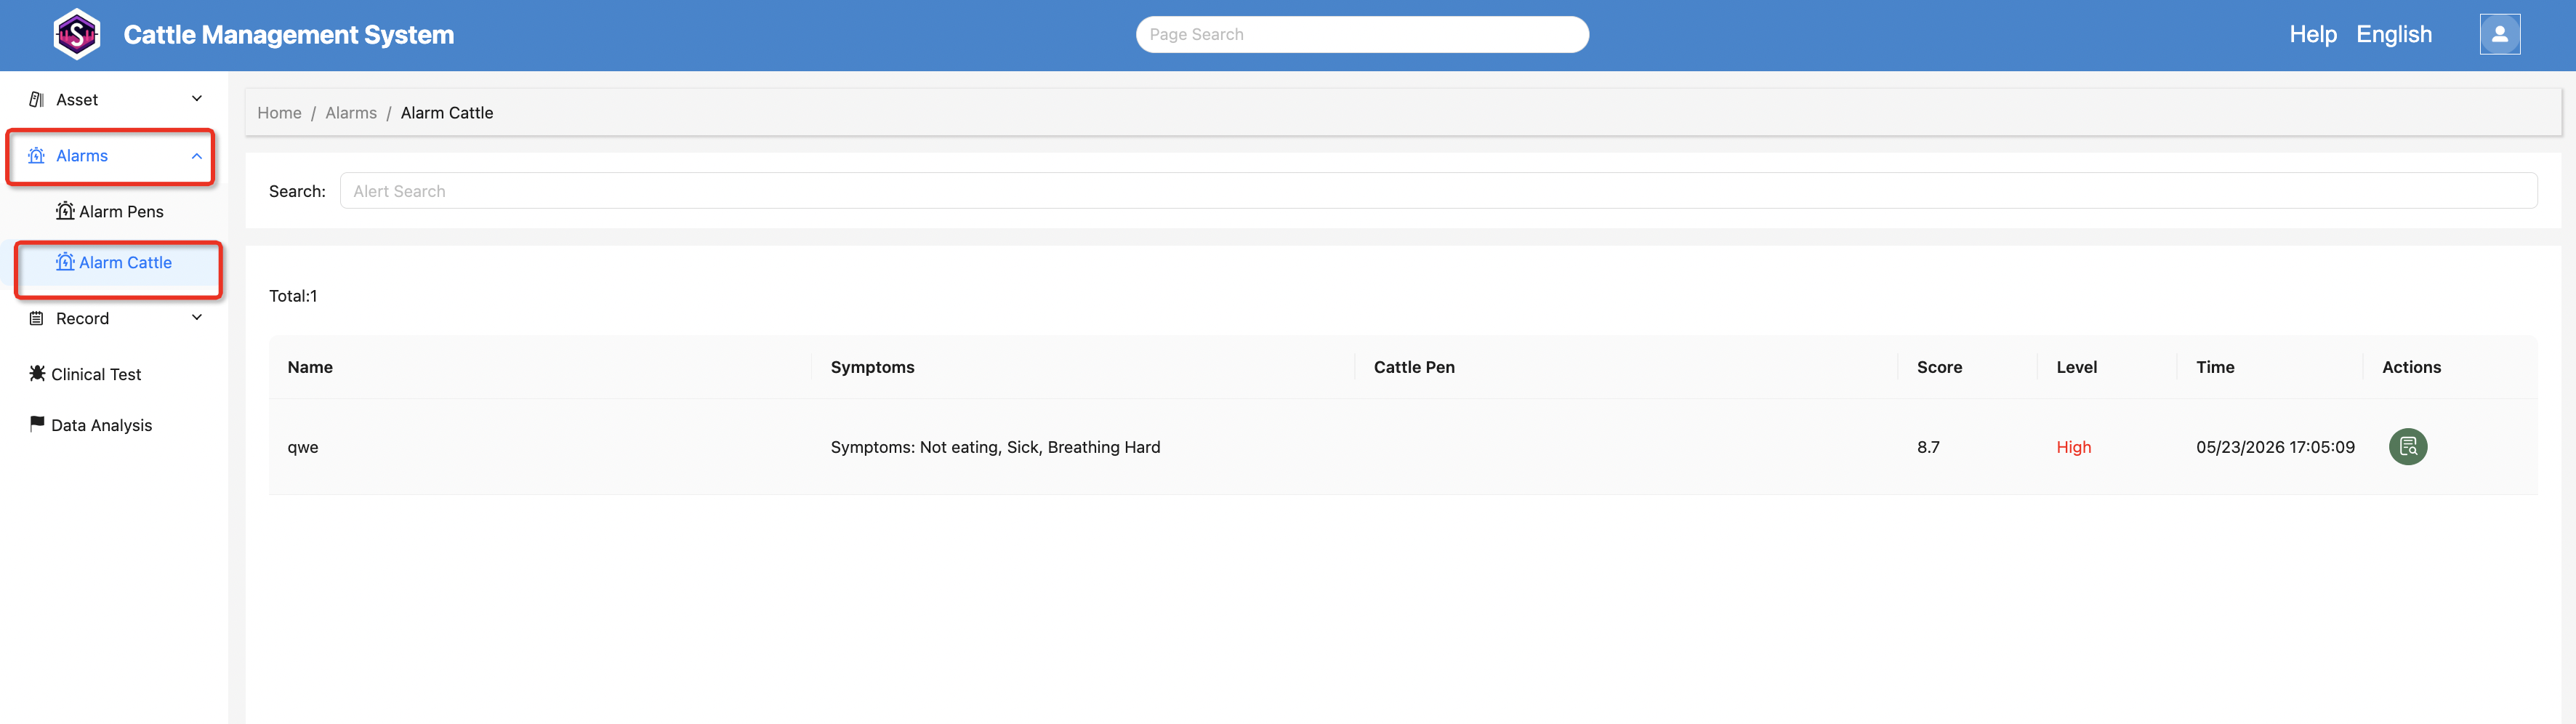
6.2 Alarm Cattle
Navigate to:
Alarms → Alarm Cattle
to view all alarm cattle records.
6.3 Creating and Clearing Alarms
Alarm creation and alarm clearing operations must be performed in the mobile App.
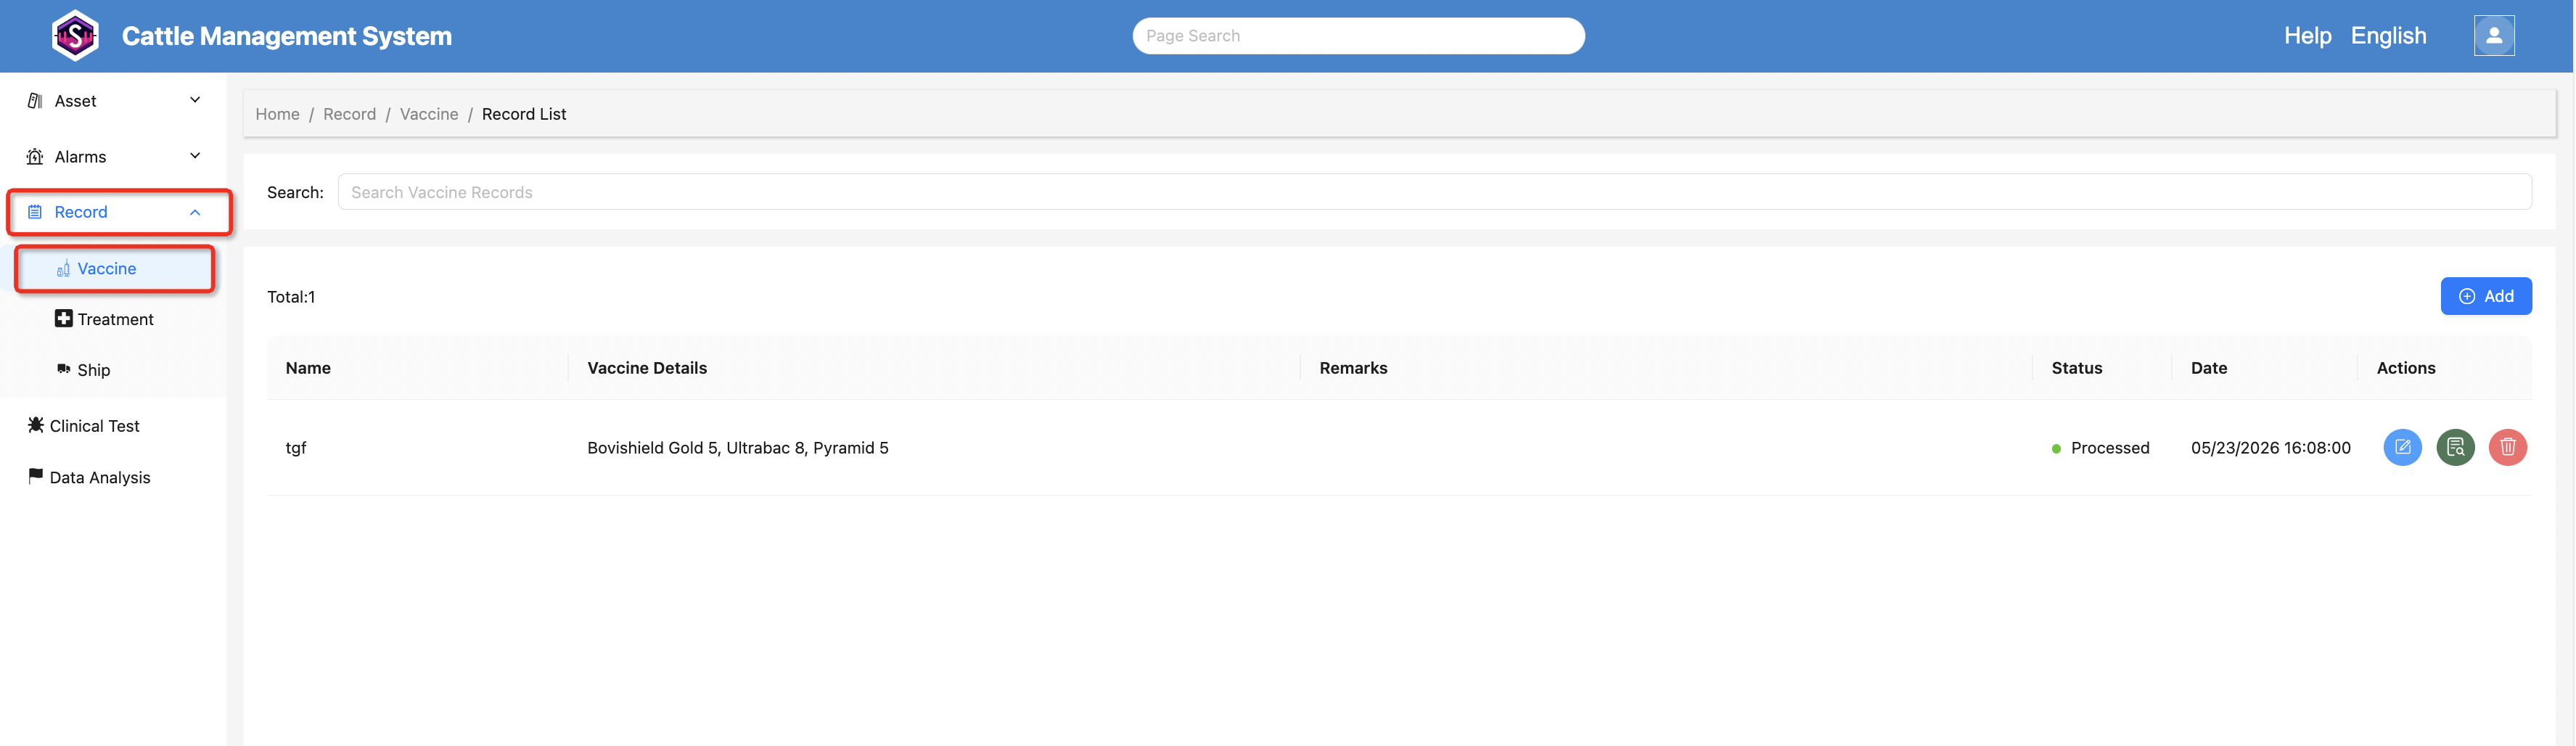
7. Vaccination Records
Navigate to:
Record → Vaccine
to view vaccination records.
The list displays:
- Record Name
- Vaccine Details
- Processing Status
You can also edit the record content directly.
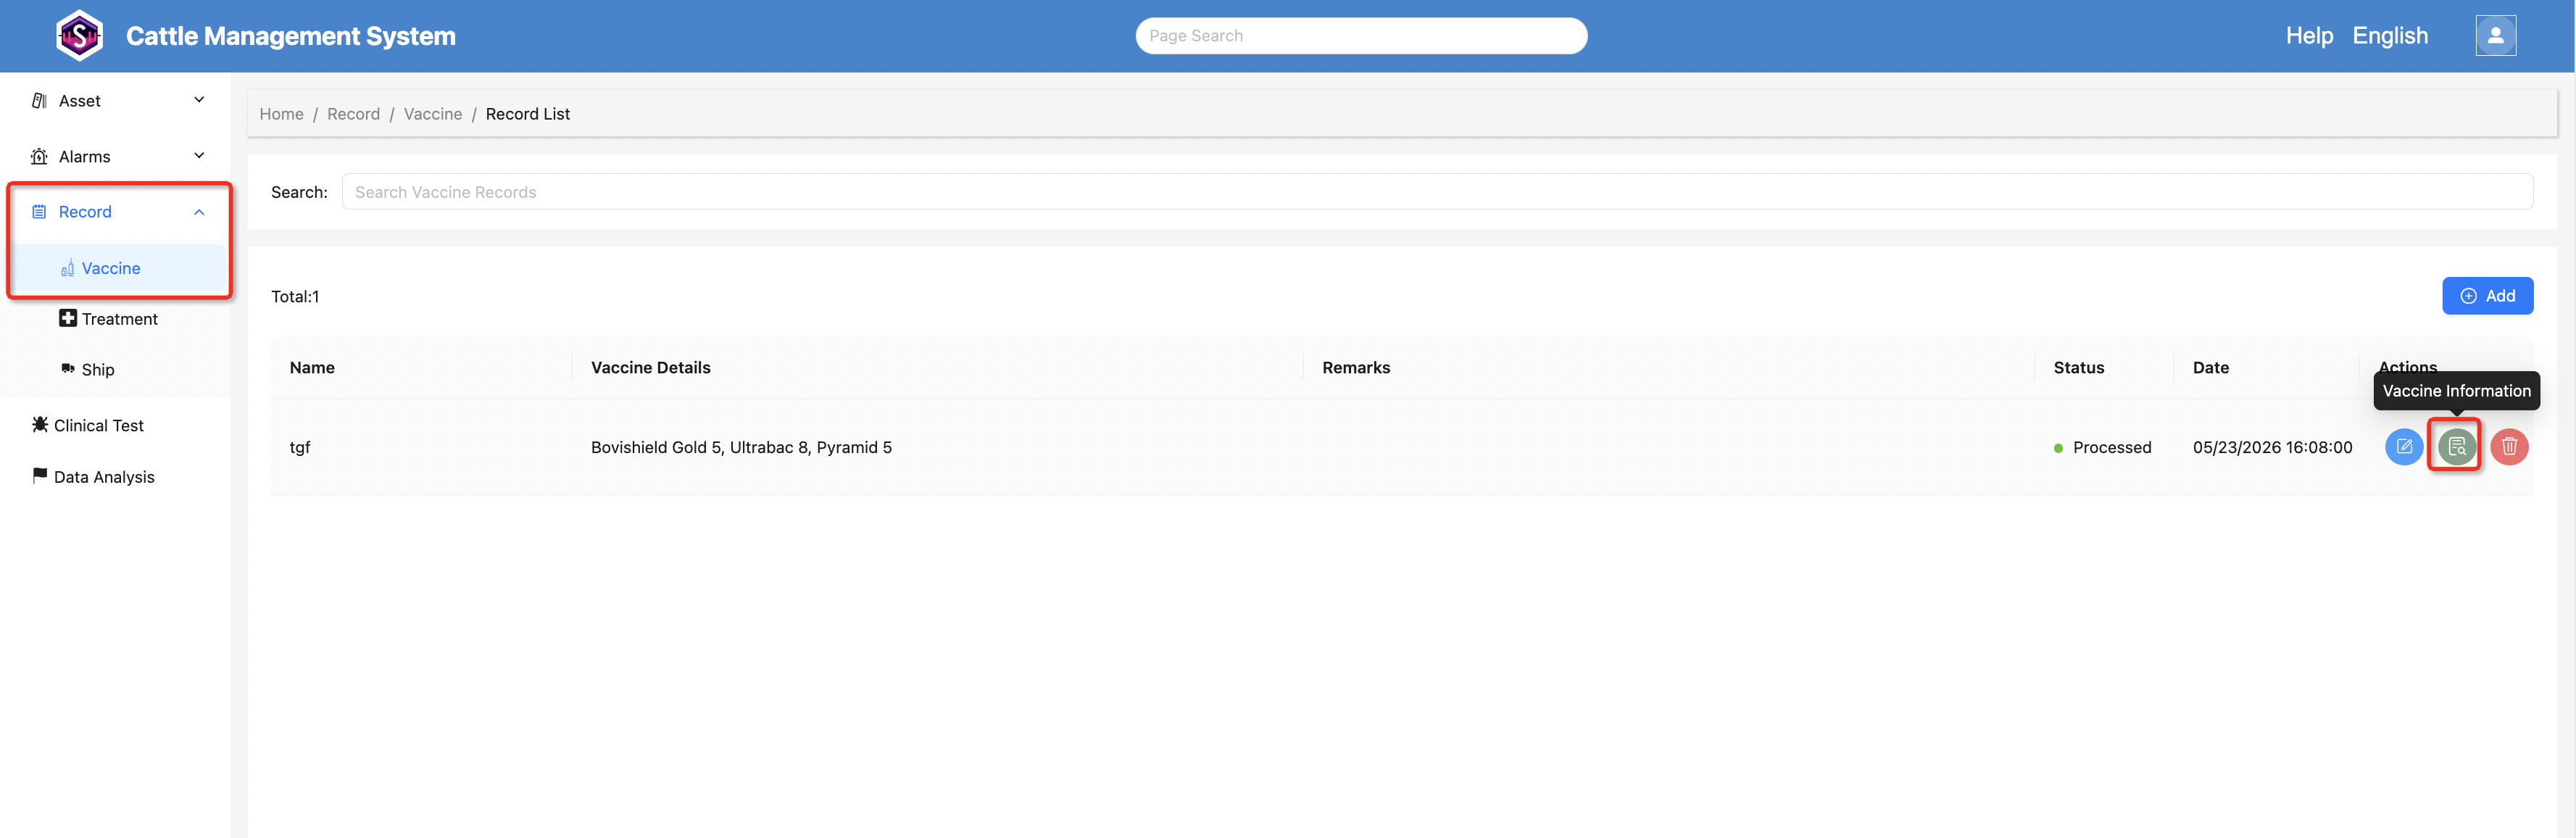
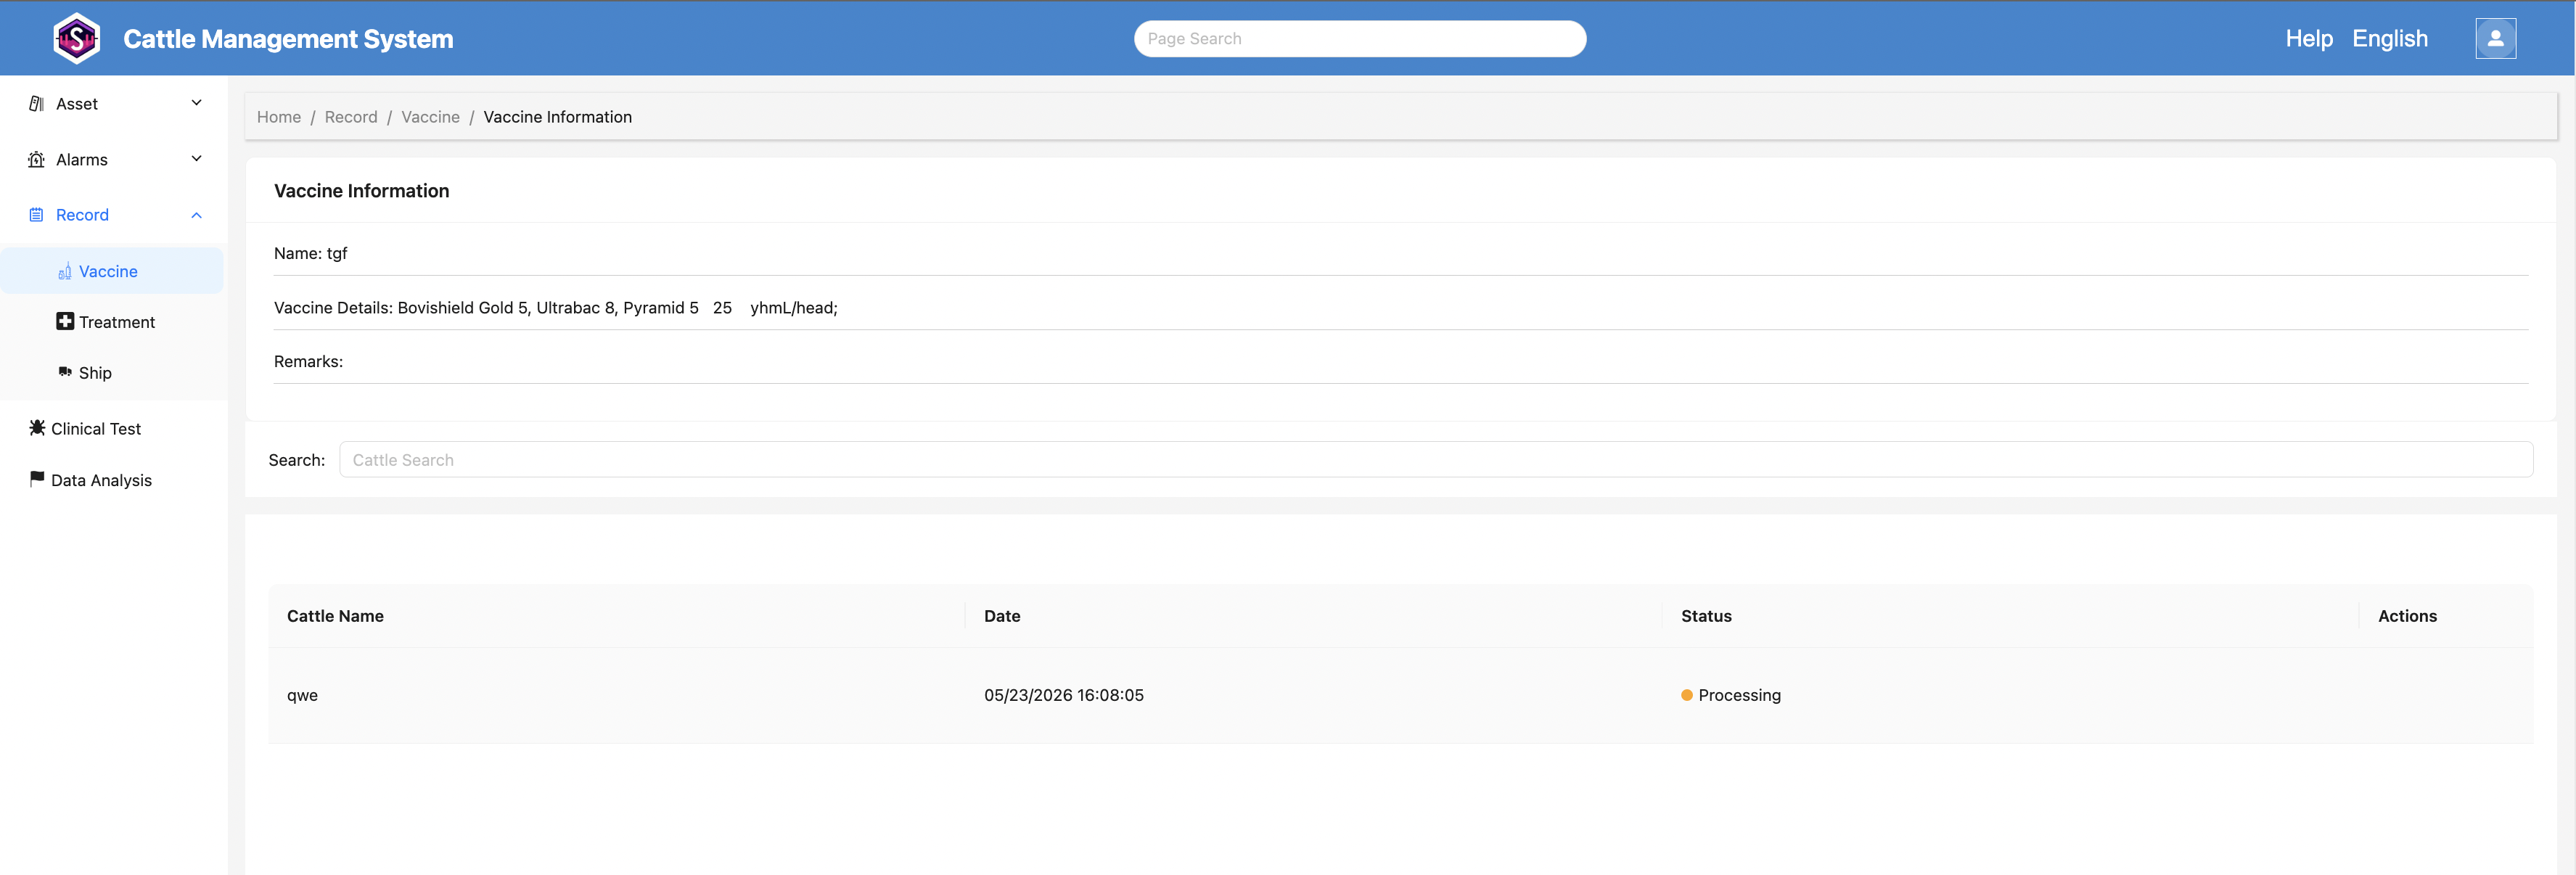
Click the Vaccine Information button in the list to view:
- Vaccine Information
- Notes
- Vaccinated Cattle List
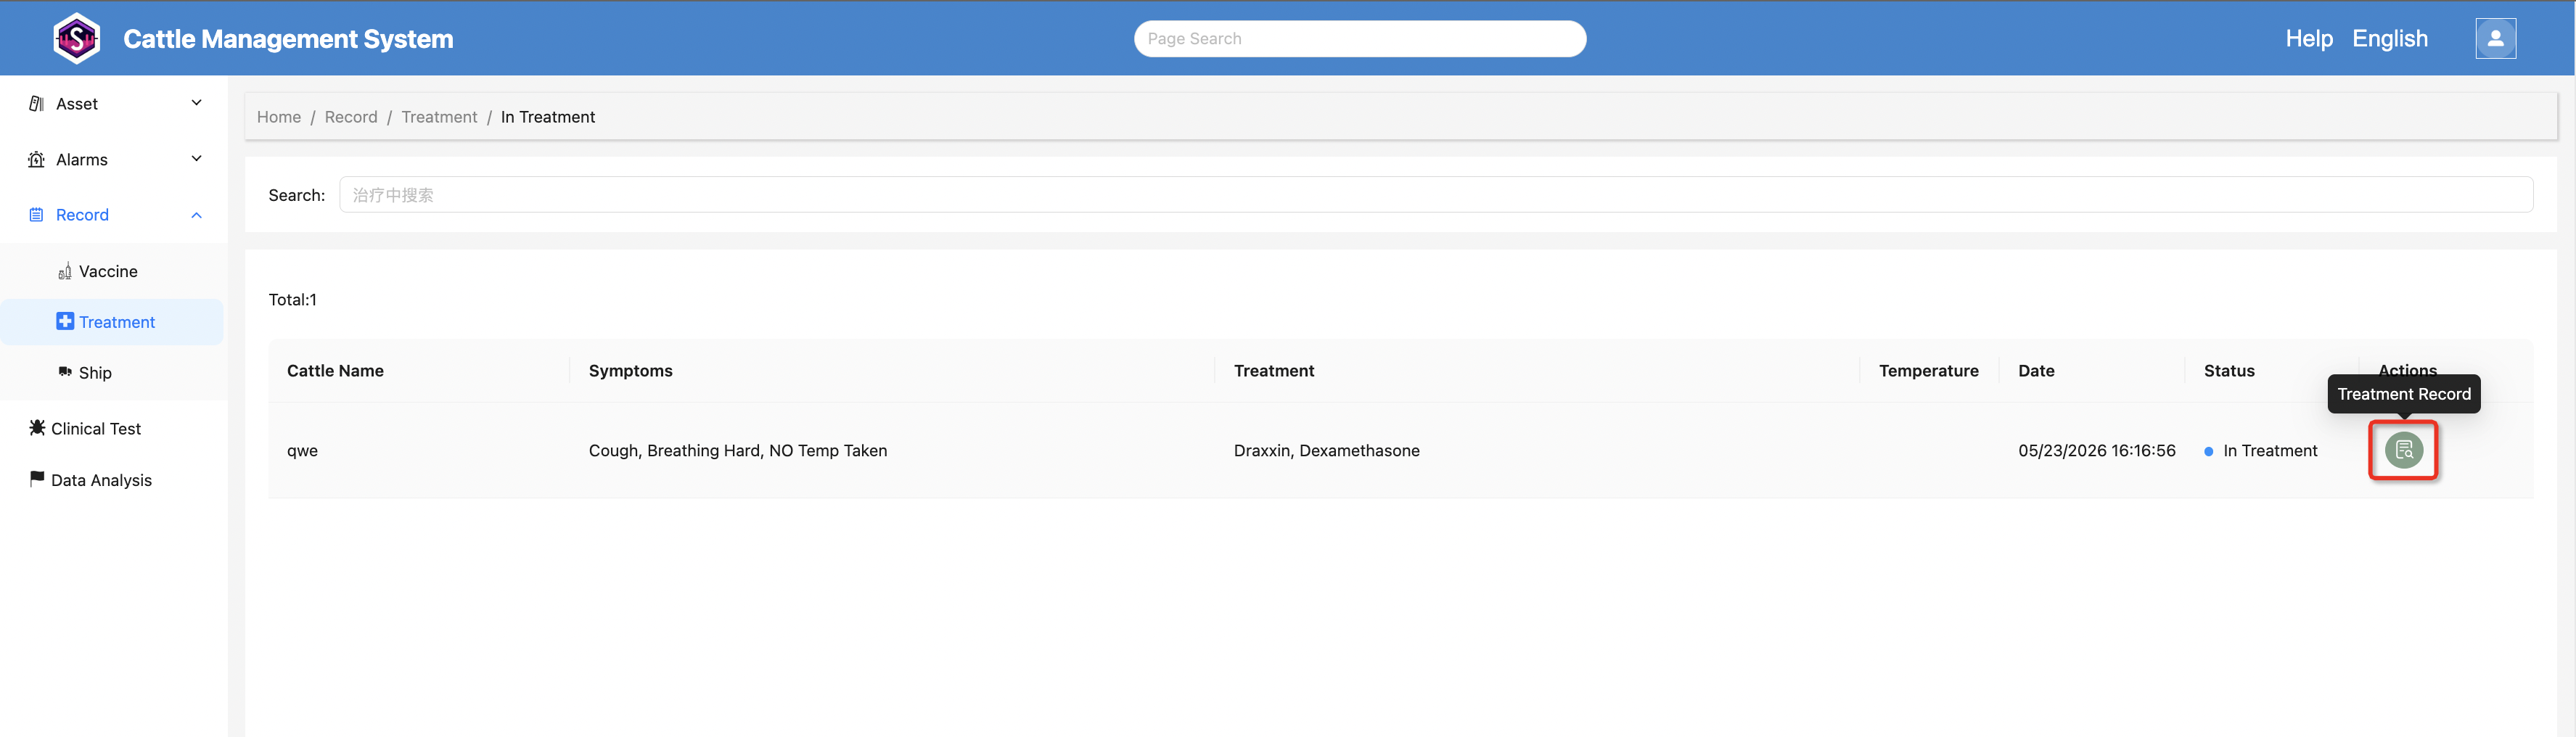
8. Treatment Records
Navigate to:
Records → Treatment
to enter the page showing cattle currently under treatment.
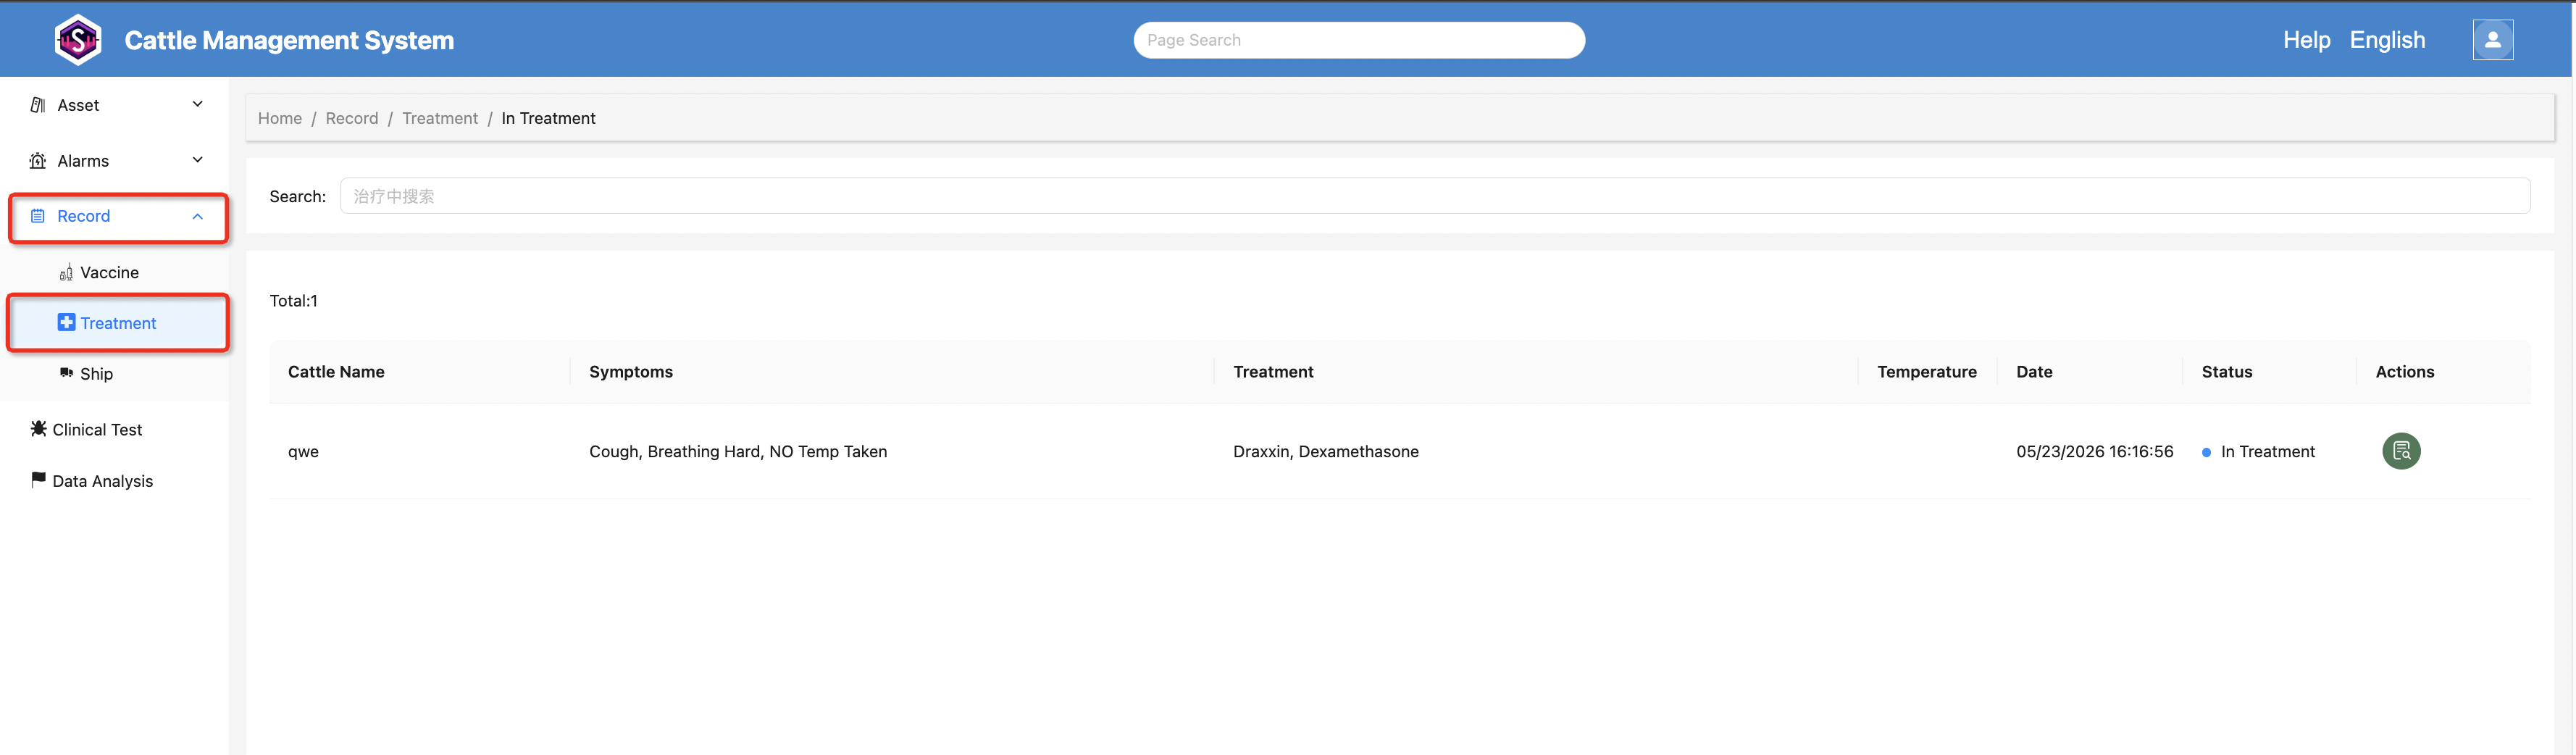
The list displays:
- Latest Symptoms
- Treatment Plan
- Body Temperature Information
Click the “Treatment Record” button for a cattle record to view all treatment histories of that cattle.

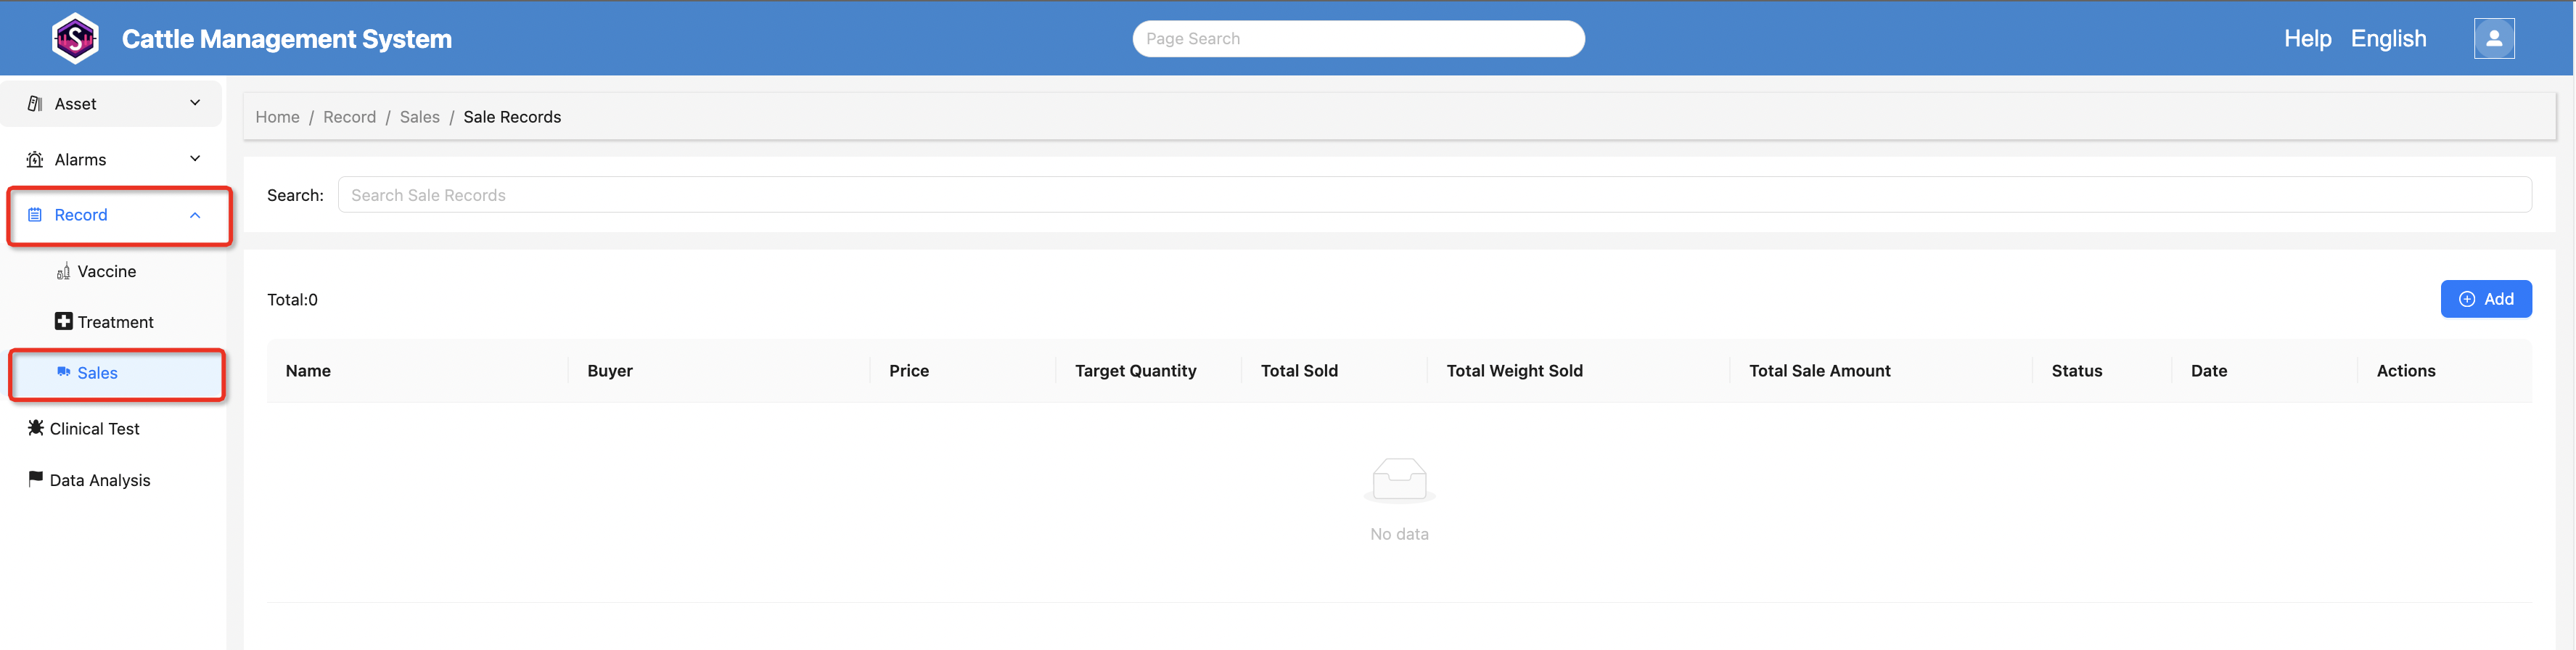
9. Sales Records
Navigate to:
Records → Sales
to view all sales records.
The list includes:
- Buyer Information
- Unit Price
- Target Quantity
- Total Sold Quantity
- Total Sold Weight
- Total Sales Amount
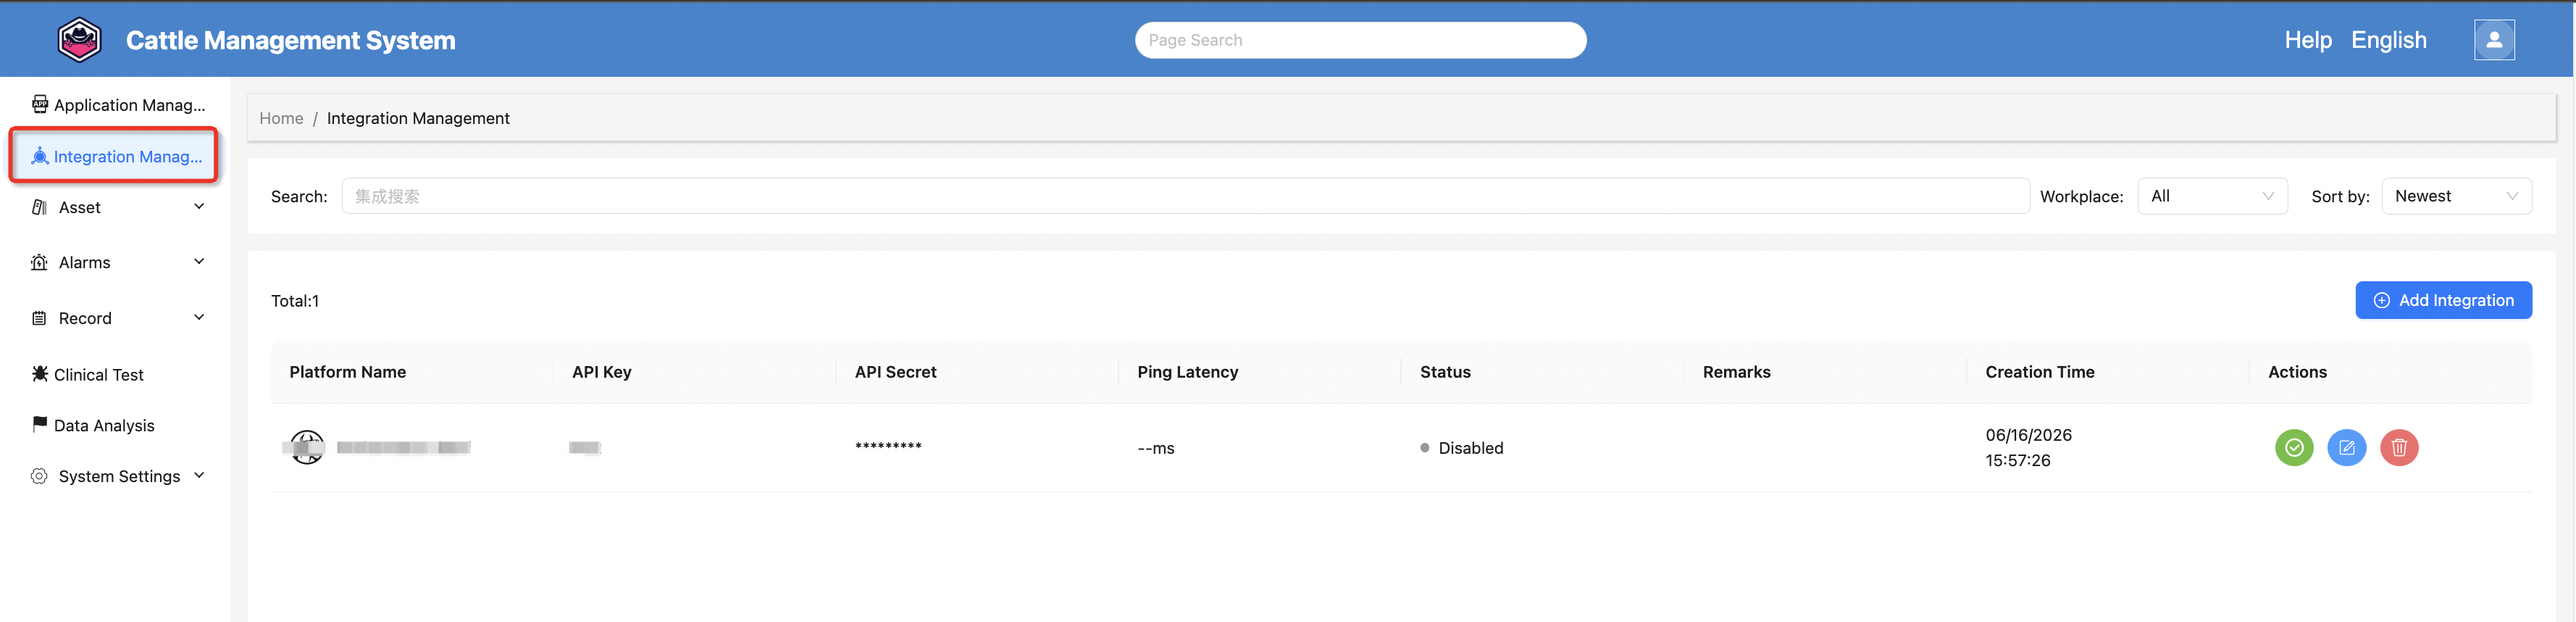
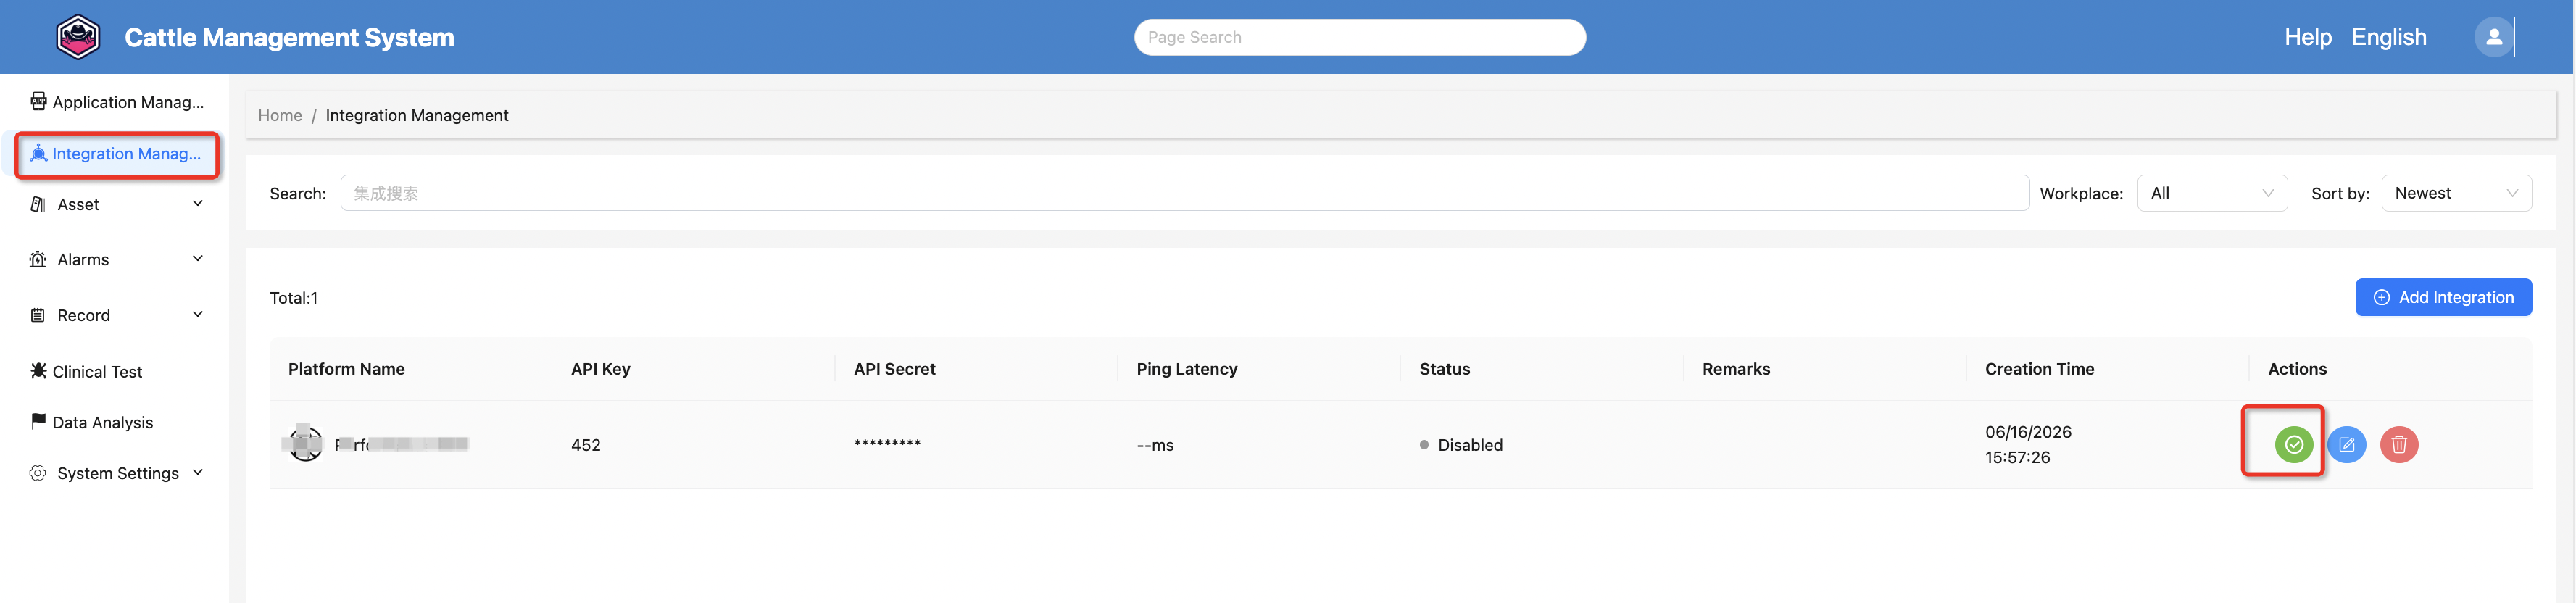
10. Integration Management
Click Integration Management in the left menu to enter the integration list page. This page displays all configured integrations, including platform name, API Key, API Secret, Ping latency, connection status, remarks, creation time, and action buttons.
From this page, you can view all connected platforms, check which integrations are currently enabled, and monitor their Ping latency.
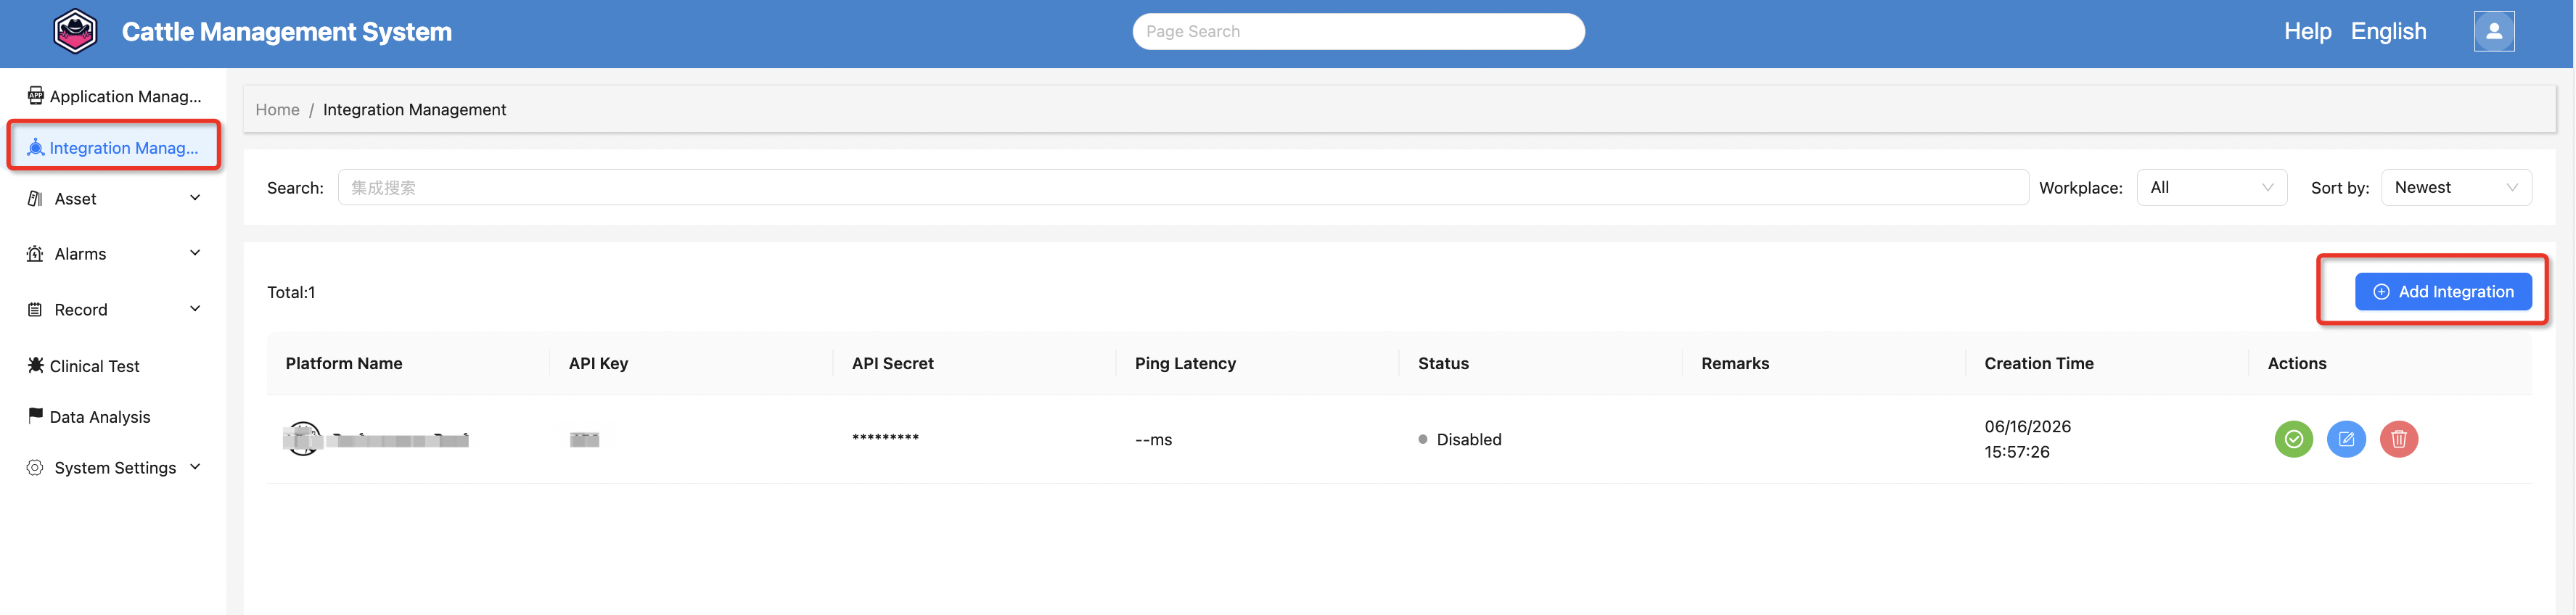
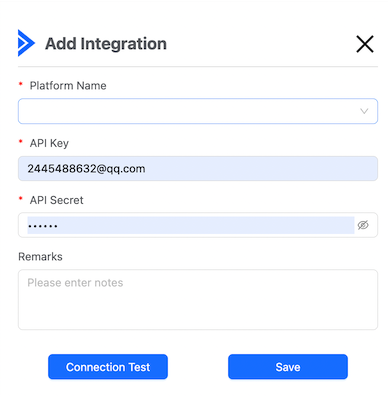
10.1 Add Integration
Click the Add Integration button in the top-left corner to open the creation dialog.
Please fill in the following fields:
- Platform Name
- API Key
- API Secret
- Remarks
After filling in the information, you can click Test Connection to verify whether the configuration is correct and whether the platform can be successfully connected.
When clicking Save, the system will also perform a connection test to ensure the data is valid. The integration will be created successfully only after the test passes.
10.2 Enable / Disable Integration
After an integration is created, you can enable or disable it from the Actions column in the list.
- If the integration is enabled, a Disable button will be shown
- If the integration is disabled, an Enable button will be shown
Click the corresponding button to change its status.
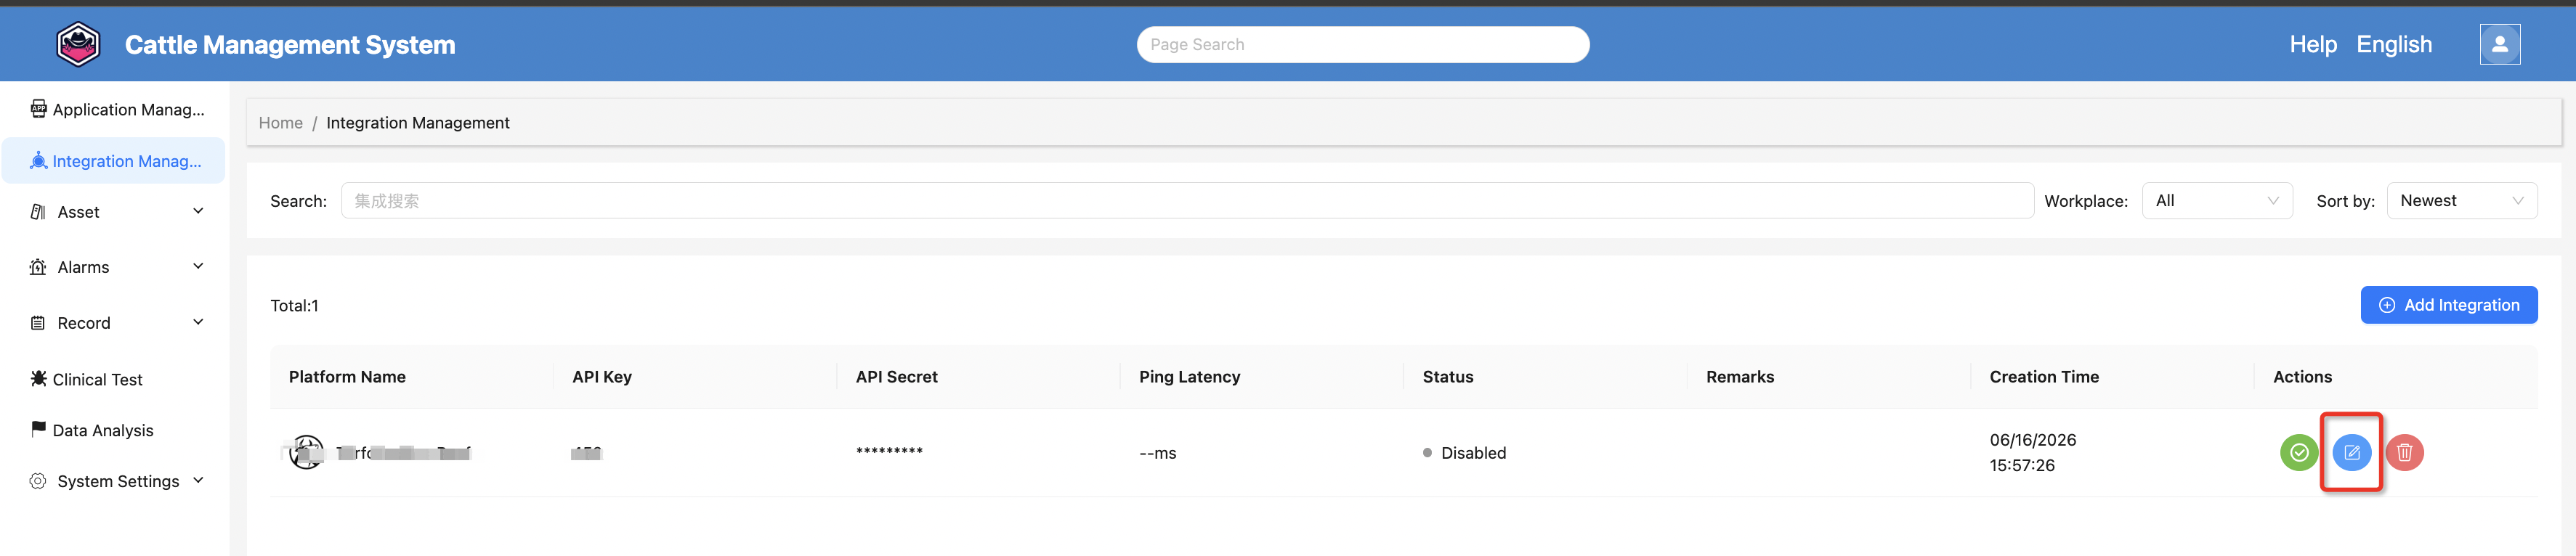
10.3 Edit Integration
Click the Edit button in the actions column to open the edit dialog and modify the integration details.
The fields are the same as those used when adding a new integration.
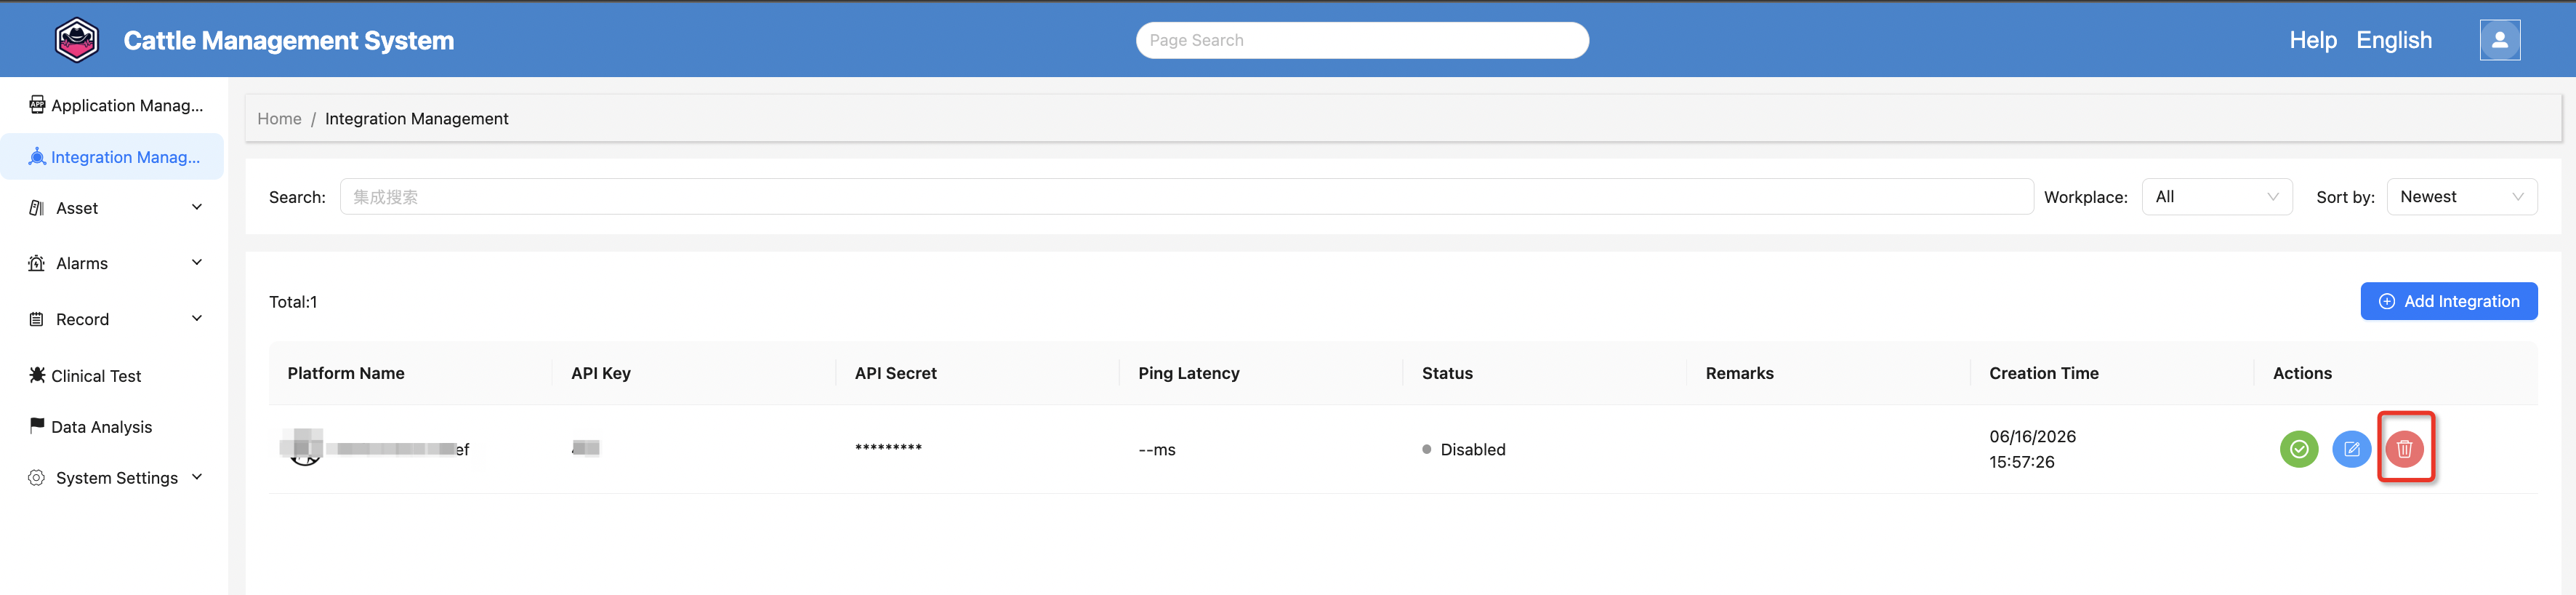
10.4 Delete Integration
Click the Delete button in the actions column to open a confirmation dialog.
Once confirmed, the integration will be permanently removed. Please proceed with caution.
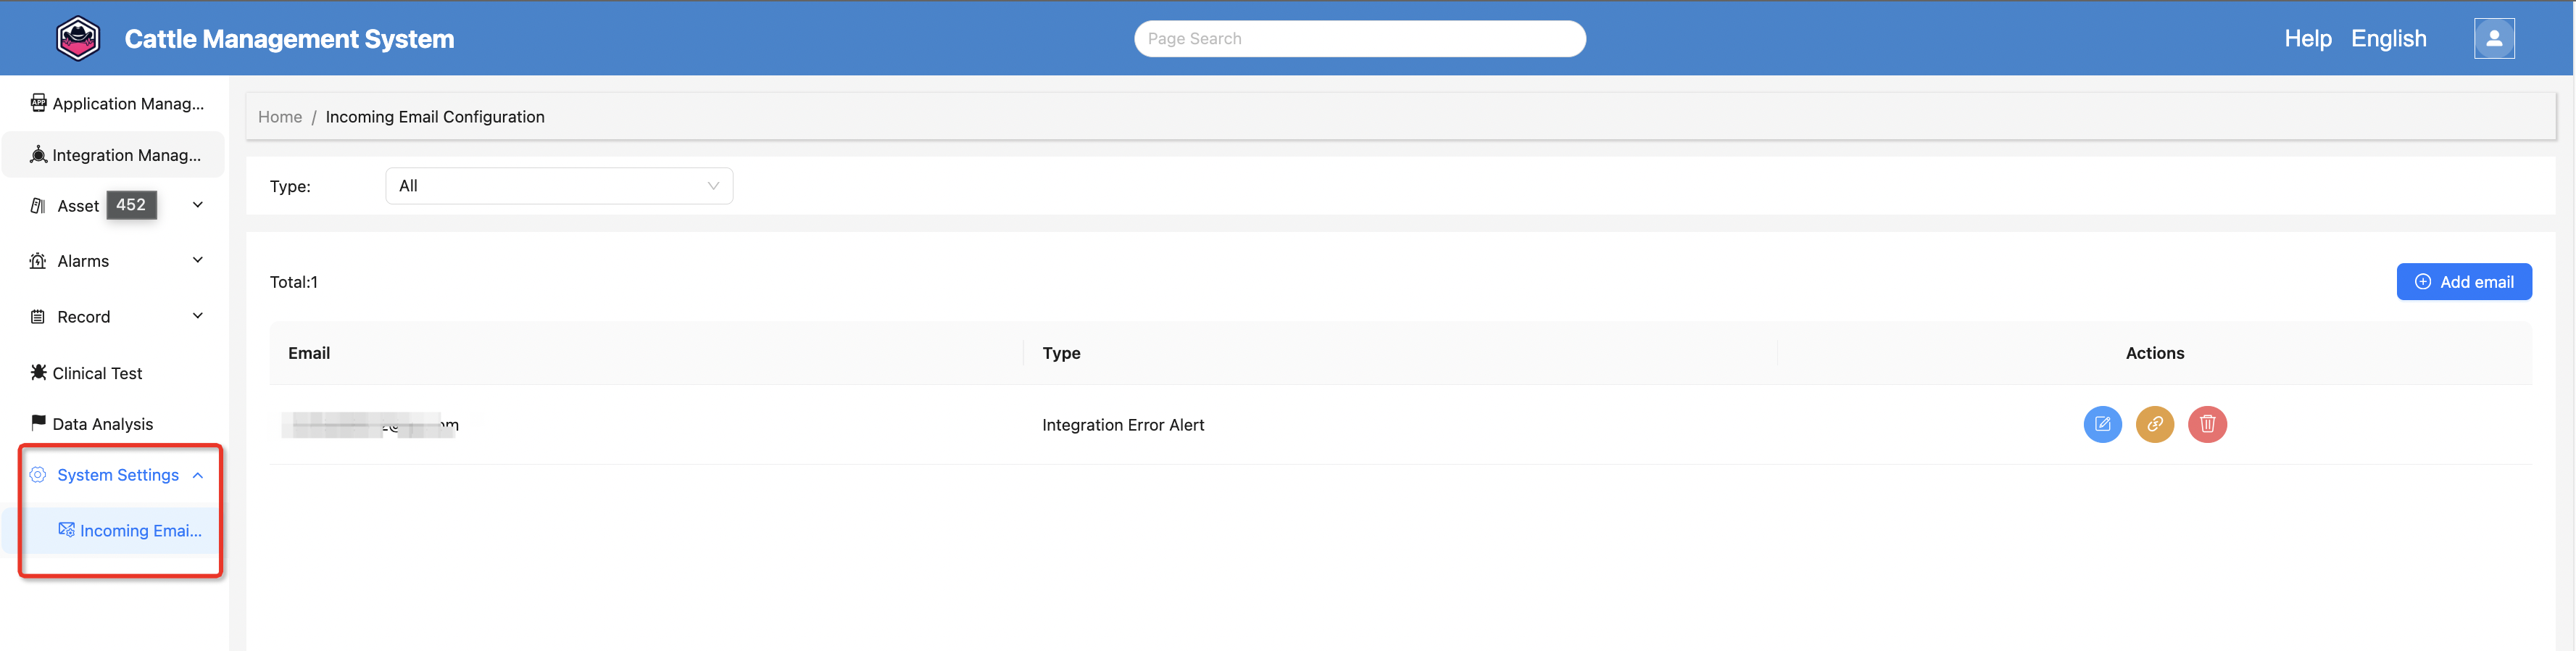
11. Incoming Email Configuration
Click Incoming Email Configuration under System Settings in the left menu to enter the email settings page.
On this page, you can configure email notifications for integration error alerts.
When an integration is enabled, if it becomes disconnected (e.g., token expiration, API errors) or encounters runtime errors, the system will automatically send alert emails to the configured address to notify you of the issue in time.